Consolidation Planning
More and more companies are consolidating environments. Server sprawl has a high cost to any business and finding ways to consolidate to more powerful servers or to the cloud is a productive undertaking for any company.
The Consolidation planner in Enterprise Manager has been around for quite some time, but many still don’t utilize this great feature.
Creating a Consolidation Project
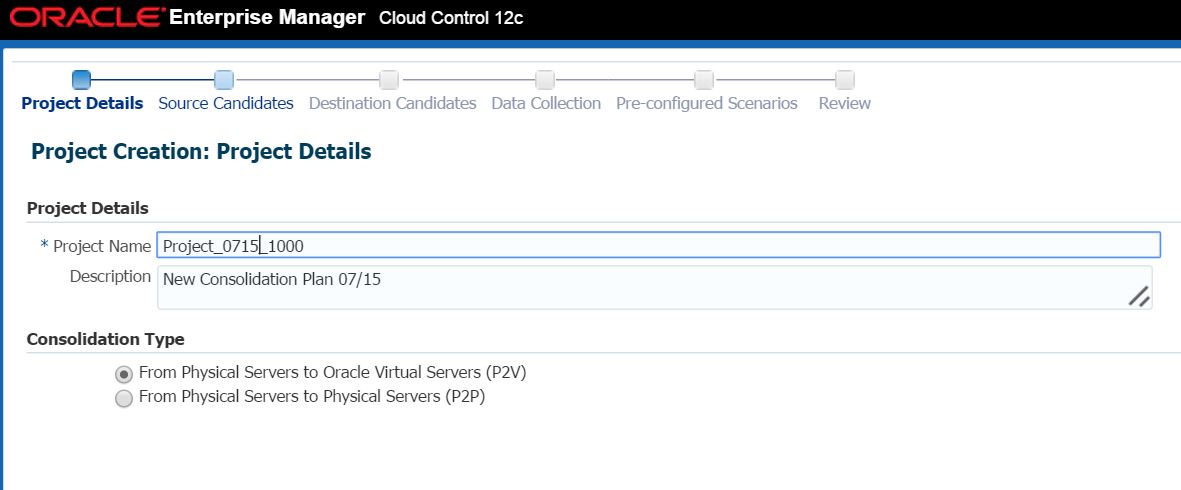
You can access the Consolidation Planner from the main Enterprise menu from Cloud Control in EM12c. There are two consolidation types currently available physical to physical, (P2P) or physical to virtual, (P2V) consolidation. For our example, we’ll perform a P2P, (physical) consolidation project.
Once you choose the option for your consolidation project, choose the servers you wish to add to your project.
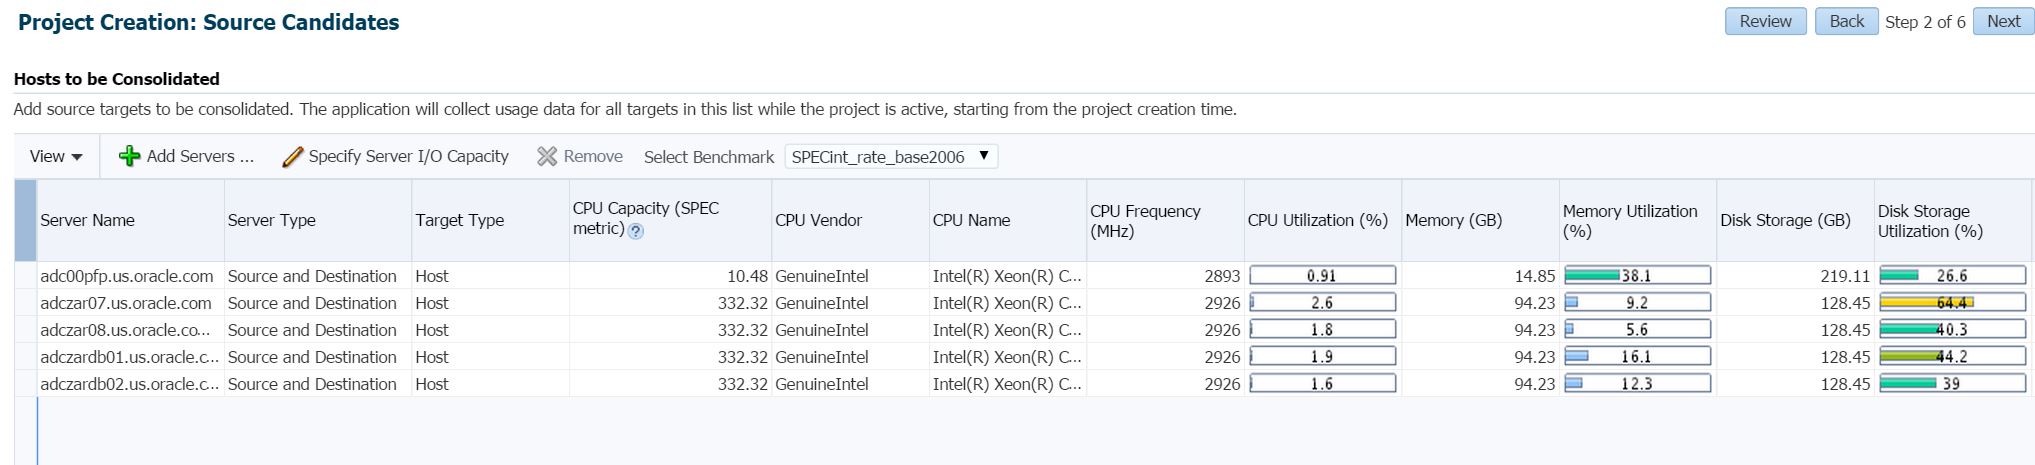 The planner let’s you know the current resource usage of the hosts that you wish to include in your consolidation project. This assists the administrator, giving a high level view if the servers are an option for consolidation.
If you scan to the right, you can view more information, including network and disk IO.
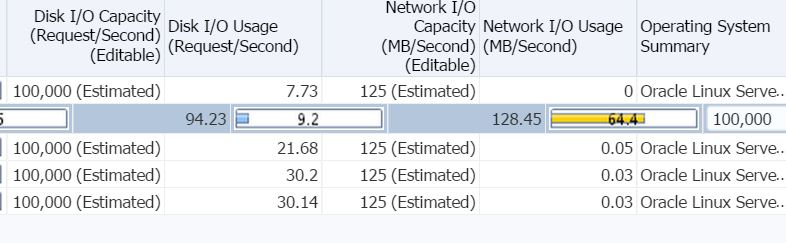
Note that the 07 host has high network I/O and capacity demands that will need to be taken into consideration if consolidating. Once you are certain that you have all hosts that you wish to consolidate to a new host or engineered system, click on Next.
Choose the system you wish to consolidate to and the hosts will be displayed, along with current resource usage if already the home of databases.

As displayed to the right, we can see that the destination doesn’t contain the network waits that the 07 host is facing and so we can see that the potential candidates for consolidation are possible.
We can then click Next and choose the amount of workload data we would like to use for our comparison and if we would like to run the job now or schedule it:

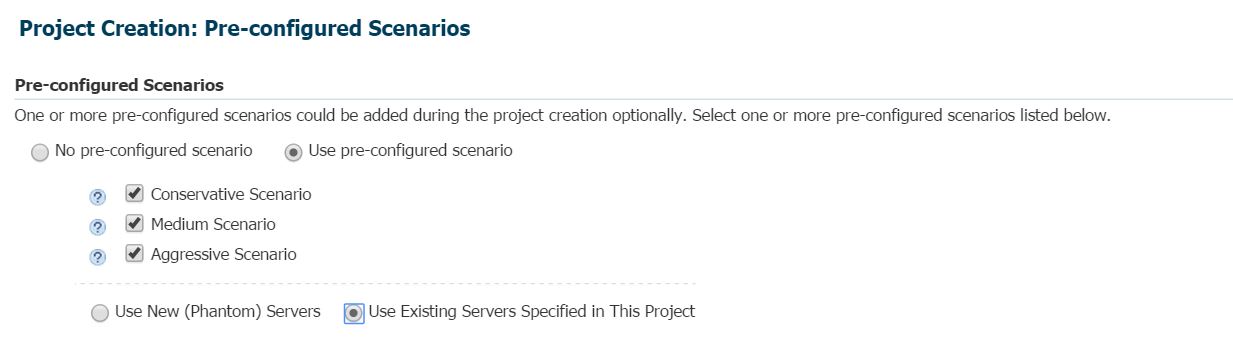
Next you’ll decide if you wish to go with the default to include no pre-configured scenarios or if you would like to add these to enhance the results.
So for my example, I’ve added pre-configured scenarios, using the existing servers that I wish to consolidate:
 Once satisfied, I can then click Next to review my consolidation project:
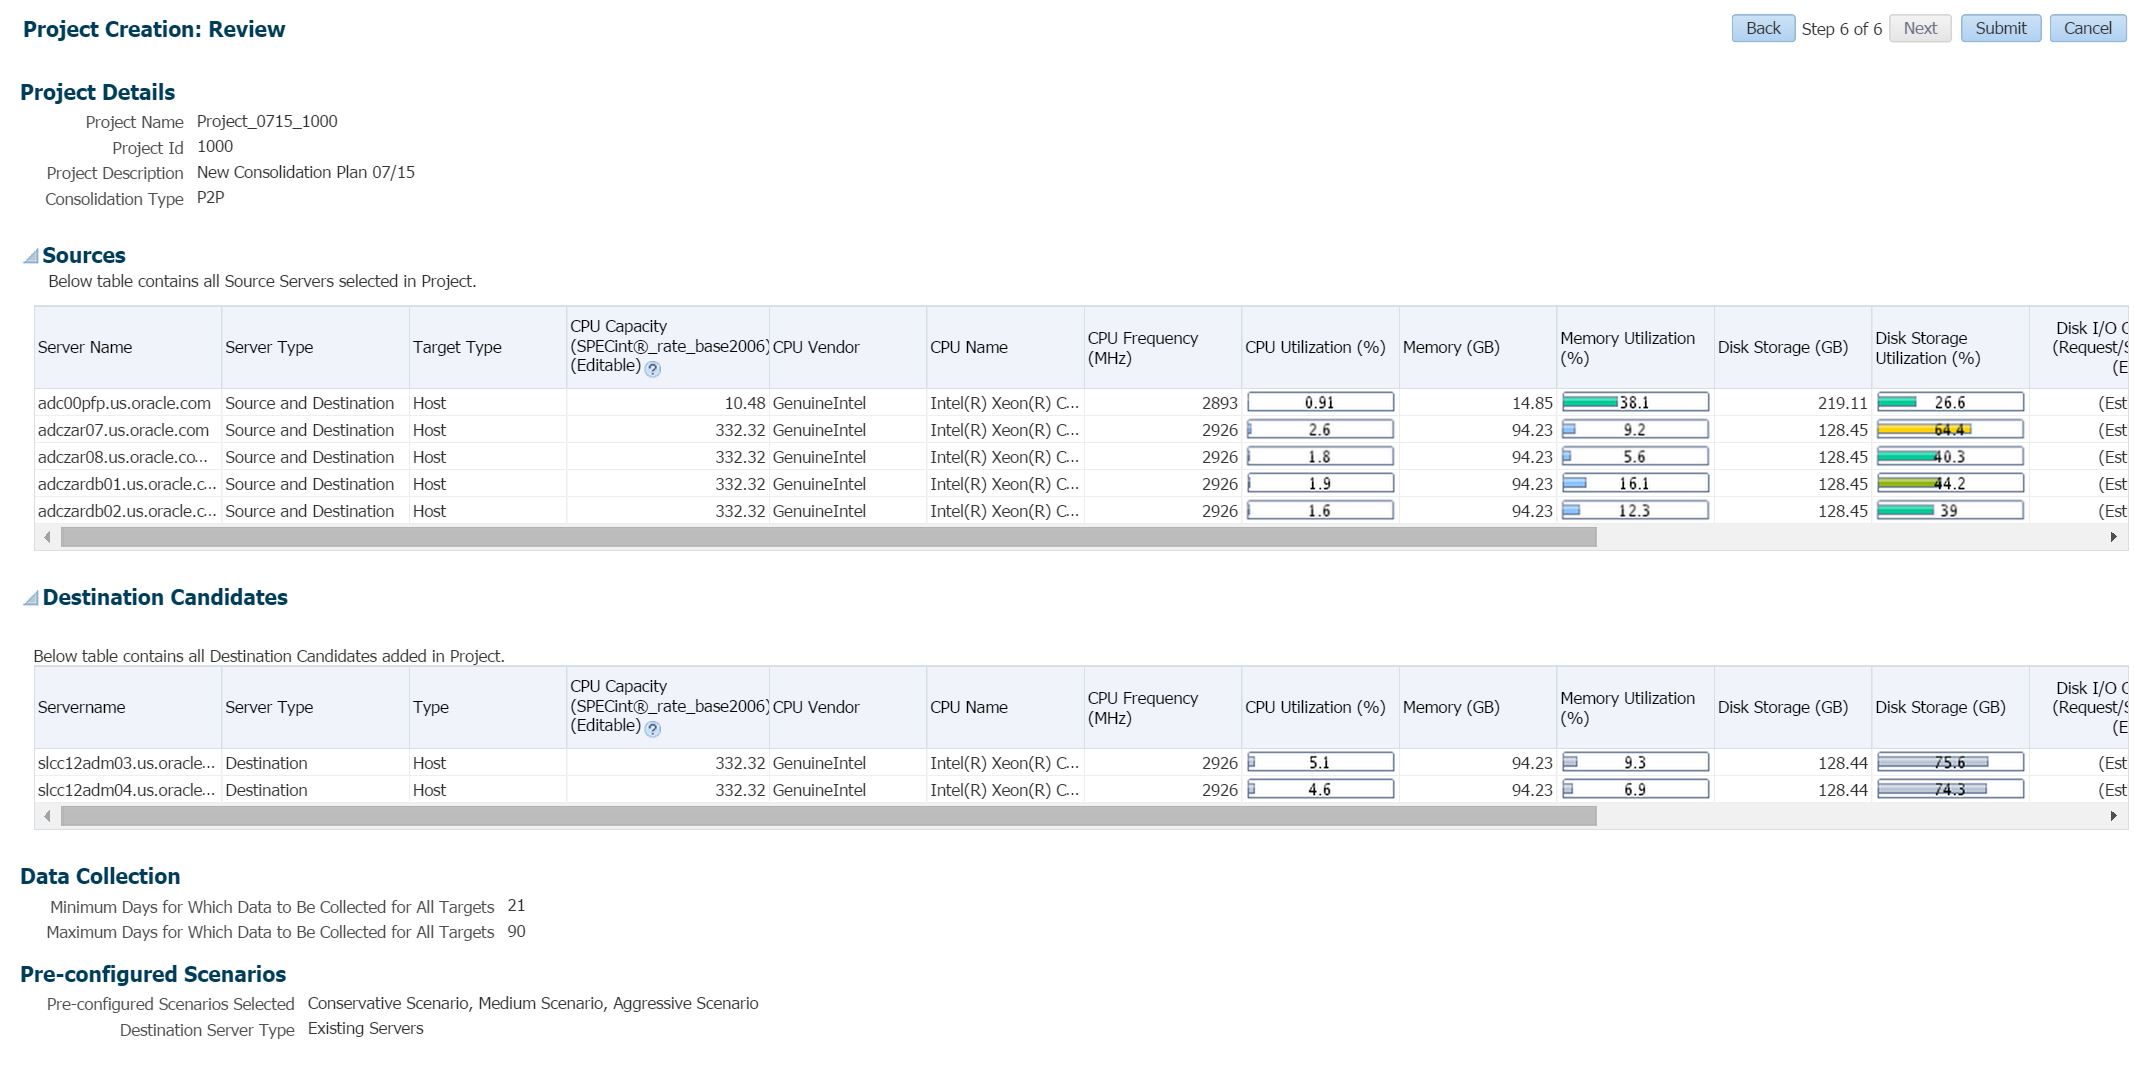
Review the project and if satisfied, click on Submit.
The Consolidation Project
The project is now in place and collecting data to ensure the most valid information is known for consolidation.

You can see that the project is in the process of collecting the data in the third column for each of the advanced scenarios I requested. The job that collects all this data can be displayed from the Job Activity screen:

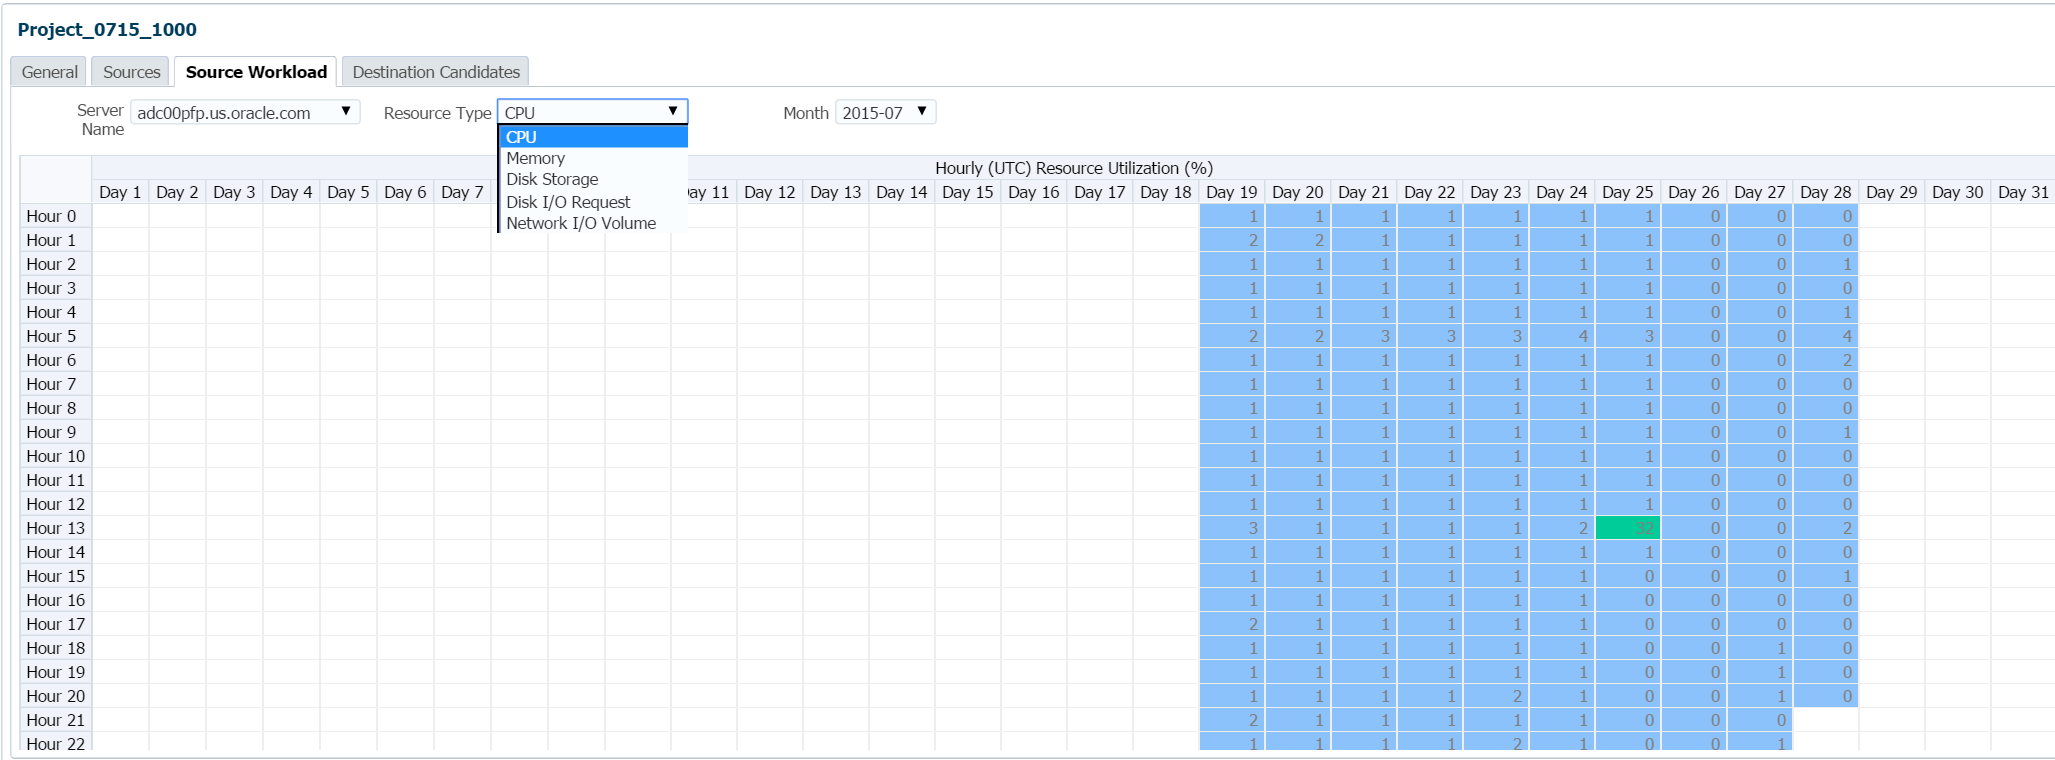
Back on the Consolidation Project screen, there are four tabs at the bottom that offer us information about our project. This data can be viewed at anytime from the Consolidation console-
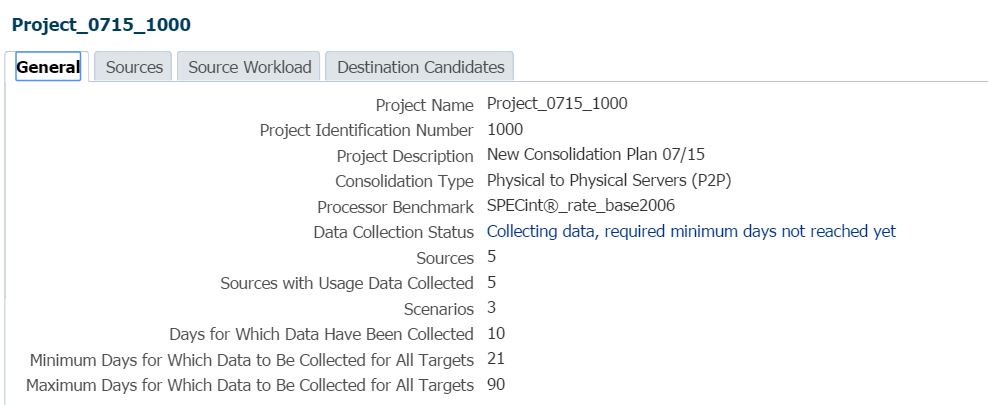
Notice that the amount of days that our review data is for hasn’t come close to being achieved, so this is shown in the General information tab. We can also view the sources involved and see if any changes in resource usage has occurred:

We’ll need to return to this next tab after the data collections have occurred, but just to review, this is where we start to see how our consolidation data plays out:
 We’ll stop here for now and revisit this in three weeks when the consolidation collection is finished and all the data is populated. You now know how to create a project and next time we’ll go over how to use this data.
Pingback: Consolidation Planning | Enterprise Manager Cloud Control - Rob Zoeteweij