Hybrid Gateways and the Oracle Public Cloud with EM13c
This is going to be a multi-post series, (I have so many of those going, you’d hope I’d finish one vs. going onto another one and coming back to others, but that’s just how I roll…:))
As I now have access to the Oracle Public Cloud, (OPC) I’m going to start by building out some connectivity to one of my on premise Enterprise Manager 13c environments. I had some difficulty getting this done, which may sounds strange for someone who’s done projects with EM12c and DBaaS.

Its not THAT hard to do, it’s just locating the proper steps when there are SO many different groups talking about Database as a Service and Hybrid Cloud from Oracle. In this post, we’re talking the best and greatest one- Enterprise Manager 13c’s Database as a Service.
Generate Public and Private Keys
This is required for authentication in our cloud environment, so on our Oracle Management Service, (OMS) environment, let’s create our SSH keys as our Oracle user, (or the owner of the OMS installation):
ssh-keygen -b 2048 -t rsa
Choose where you would like to store the support files and choose not to use a passphrase.
Global Named Credential for the Cloud
We’ll then use the ssh key as part of our new named credential that will be configured with our cloud targets.
Click on Setup, Security and then Named Credentials. Click on Create under the Named Credentials section and then proceed to follow along with these requirements for the SSH secured credential:
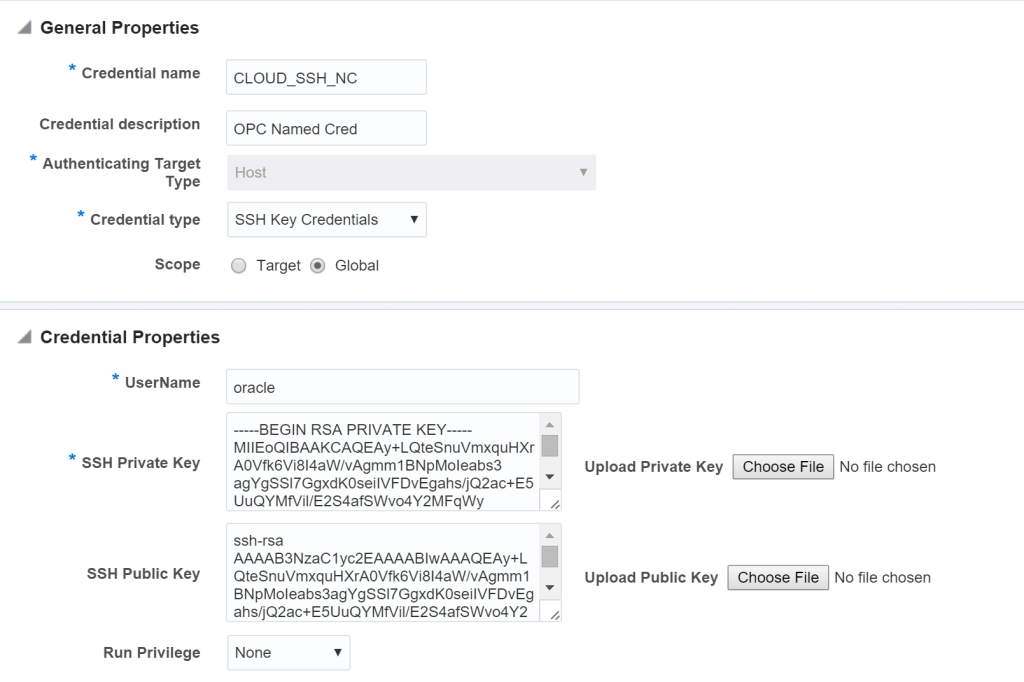
Now most instructions will tell you that you need to “Choose File” to load your SSH Private and Public Keys into the Credential properties, but you can choose to open the file and just copy and paste the information into the sections. It works the same way. Ensure you choose “Global” for the Scope, as we don’t have a target to assign this to yet.
Once you’ve entered this information in, click on Save, as you won’t be able to test it. I will tell you, if you don’t paste in ALL of the information from each of the the public and private key file in the properties section, it has checks for the headers and footers that will cause it to send an error, (you can see the “****BEGIN RSA PRIVATE KEY****” and “ssh-rsa” in the ones I pasted into mine.)
Create a Hybrid Cloud Agent
Any existing agent can be used for this step and will then serve two purposes. It will be both the local host agent, as well as an agent for the cloud, which is why its referred to as a hybrid agent.
We’ll be using EM CLI, (the command line tool for EM) to perform this step. I’m going to use the OMS’ agent, but I’d commonly recommend using another hosts and create a few to ensure higher availability.
 $ ./emcli login -username=sysman
 Enter password :

Login successful
 $ ./emcli register_hybridgateway_agent -hybridgateway_agent_list='agentname.oracle.com:1830'
 Successfully registered list of agents as hybridgateways.
Make sure to restart the agent after you’re performed this step. Deployments to the cloud can fail if you haven’t cycled the agent you’ve converted to a hybrid gateway before performing a deployment.
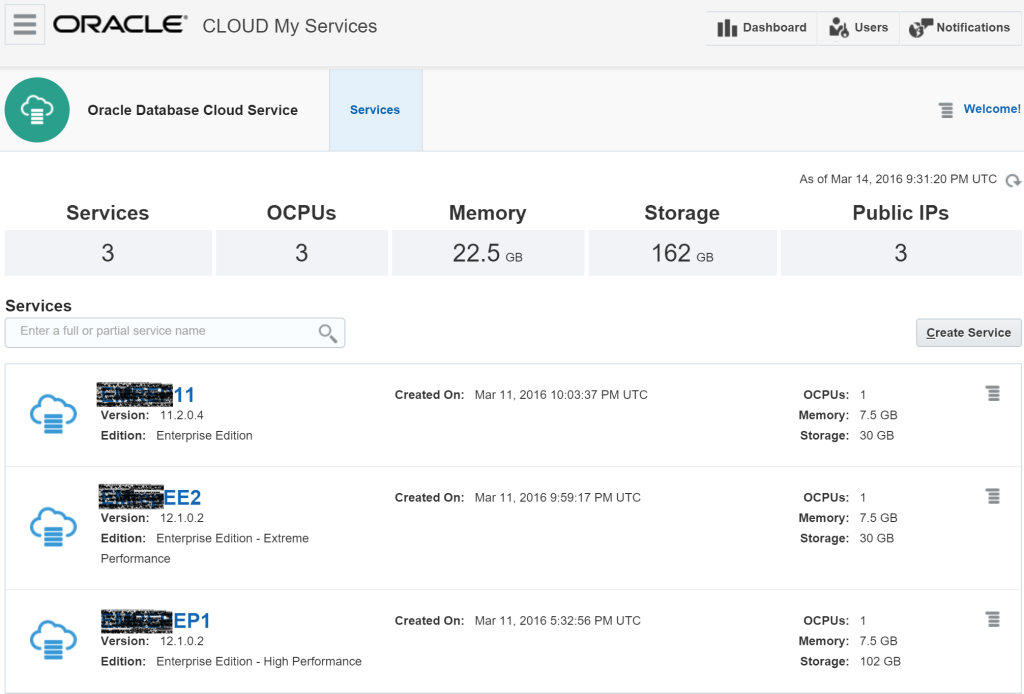
Create Database Services in OPC
Once that’s done, you’ll need to create some services to manage in your OPC, so create a database service to begin. I have three to test out with my EM13c on premise environment that we’re going to deploy a hybrid agent to.
Now that we have a couple database services createed, then I’ll need to add the information regarding each new target to the /etc/hosts file on the on premise Enterprise Manager host.
Adding the DNS Information
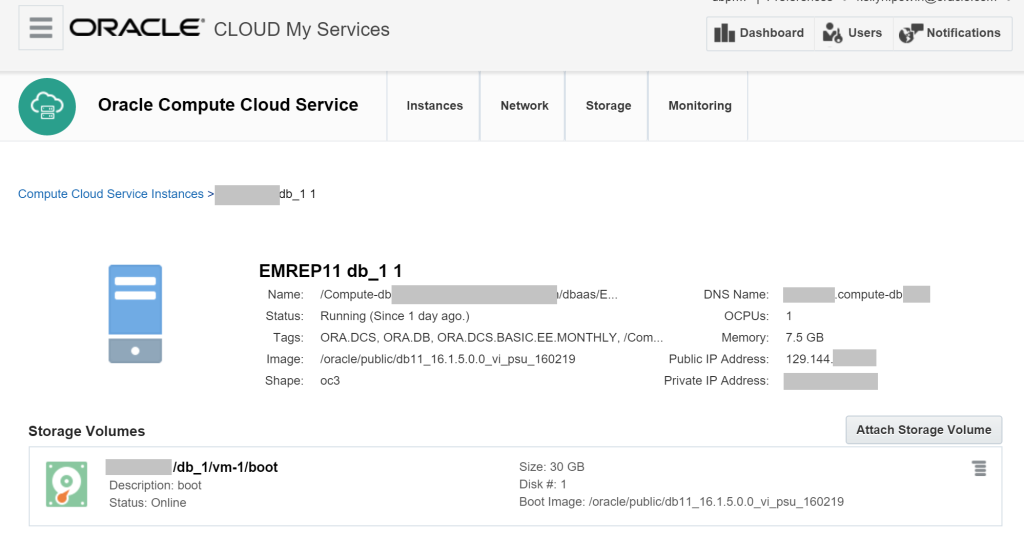
You can capture this information from your OPC cloud console by clicking the left upper menu, Oracle Compute Cloud Service.
For each service you add, the Oracle Compute Cloud Service provides the information for the DNS entry you’ll need to add to your /etc/hosts file, along with public IP addresses and other pertinent information.
Once you’ve gathered this, then as a user with SUDO privs on your OMS box, add these entries to your hosts file:
$sudo vi /etc/hosts
# ###################################### #
127.0.0.1 localhost.localdomain loghost localhost
IP Address   Host Name    Short Name
So on, and so forth....
Save the changes to the file and that’s all that’s required, otherwise you’ll have to use the IP Addresses for these environments to connect.
Now, let’s use our hybrid gateway agent and deploy to one or more of our new targets on the Oracle Public Cloud.
Manual Target Additions
We’ll add a target manually from the Setup menu, and choose to add a host target:
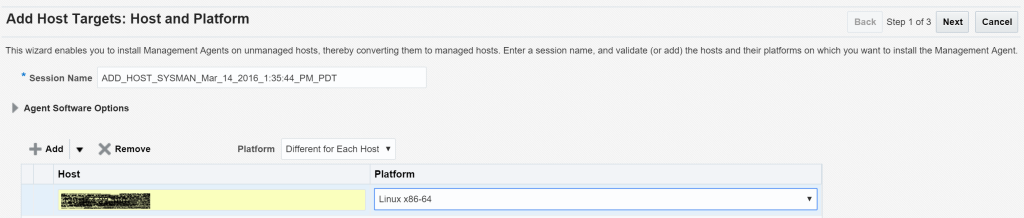
We’ll fill out the standard information of agent installation directory, run sudo command, but we’ll also choose to use our cloud credentials we created earlier and then we need to check the box for Optional Details and check mark that we’re going to configure a Hybrid Cloud Agent. If you’re OS user doesn’t have sudo to root, no problem, you’ll just need to run the root.sh script manually to complete the installation.
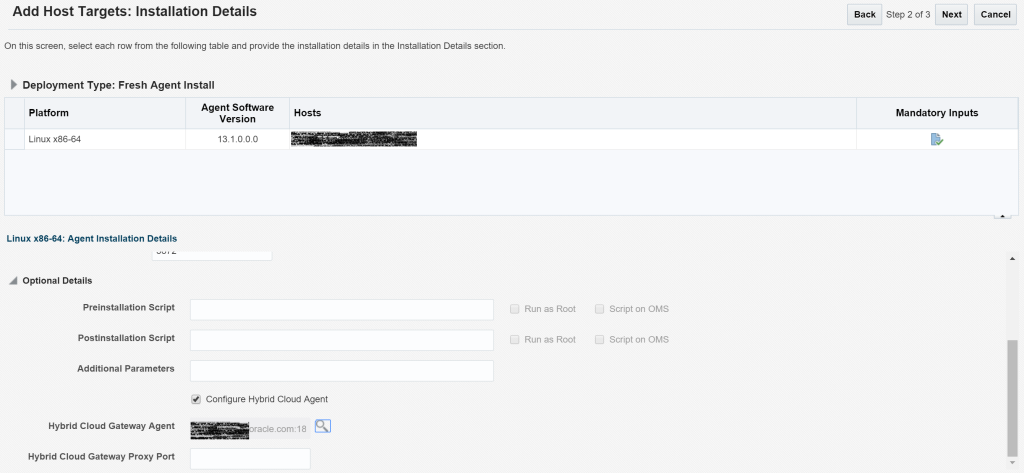
Notice that I have a magnifying glass I can click on and choose the agent that I’ve made my hybrid cloud agent. One of the tricks for the proxy port is to remove the default and let the installation deploy to the port that it finds is open. It eliminates the need to guess and the default isn’t always correct.
Click on Next once you’ve filled out these sections and if satisfied, click on Deploy Agent. Once complete, the deployment to the cloud is complete.
Next post we’ll discuss the management of cloud targets and hybrid management.
Pingback: Creating and Verify RSA SSH Keys – DBA Kevlar