
Upgrading an Amazon EC2 Delphix Source, Part II
I’m finally getting back to upgrading the Linux Source for a POC I’m doing with some folks and picking up from where we left off in Part I…

Address Display Issue
Now that we have our VNC Viewer working on our Amazon host, the first thing we’ll try is to run the Oracle installer, (unzipped location –> database –> runInstaller) but it’s going to fail because we’re missing the xdpinfo file. To verify this, you’ll need to open up a terminal from Application –> System Tools –> Terminal:
$ ls -l /usr/bin/xdpyinfo
 ls: /usr/bin/xdpyinfo: No such file or directory
We’ll need to install this with yum:
$ sudo yum -y install xorg-x11-utils
Once we’ve completed this, let’s verify our display:
$ echo $DISPLAY
:1.0 <– (0 is local, first number is the display, just as ipaddress:display for your VNC Viewer connection.)
If it’s correct, you can test it by executing xclock:
$ xclock
The clock should appear on the screen if the display is set correctly.
Install Oracle 12c
Run the installer:
$ ./runInstaller
The installer will come up for Oracle 12c and you can choose to enter in your information, but I chose to stay uninformed… 🙂 I chose to install AND upgrade the database to DB12c from 11g.
The warnings for swap and the few libraries I also chose to ignore by clicking ignore all and proceeded with the installation.
Root.sh and the Trace Analyzer
Once the installation of the new Oracle Home is complete, choose to run the root.sh script when prompted:
$ sudo /u01/app/oracle/product/12.1/db_1/root.sh
Overwrite all files when prompted by the script run and it’s up to you, but I chose to install the Oracle Trace File Analyzer so I can check it out at a later date. You’ll then be prompted to choose the database to upgrade. We’re going to upgrade our source database, ORCL in this example.
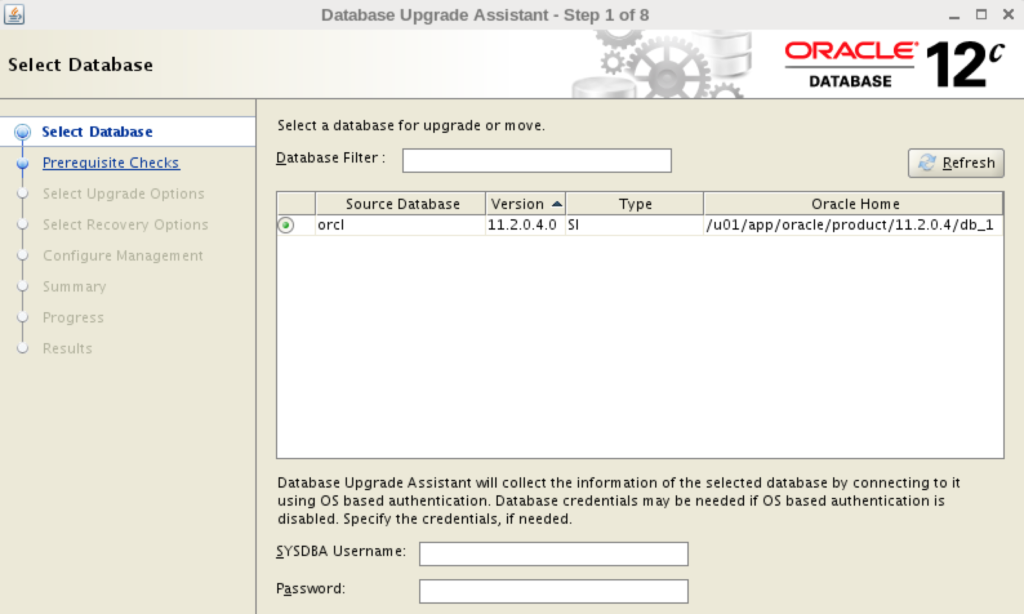
Upgrade Our Oracle DSource(Database)
Choose to proceed forward with the upgrade on the database, but know that you’ll require more space for the archive logs that are generated during the upgrade. The check will tell you how much to add, but I’d add another 1Gb to ensure you are prepared with the other steps you have to run as we go through the preparation steps.
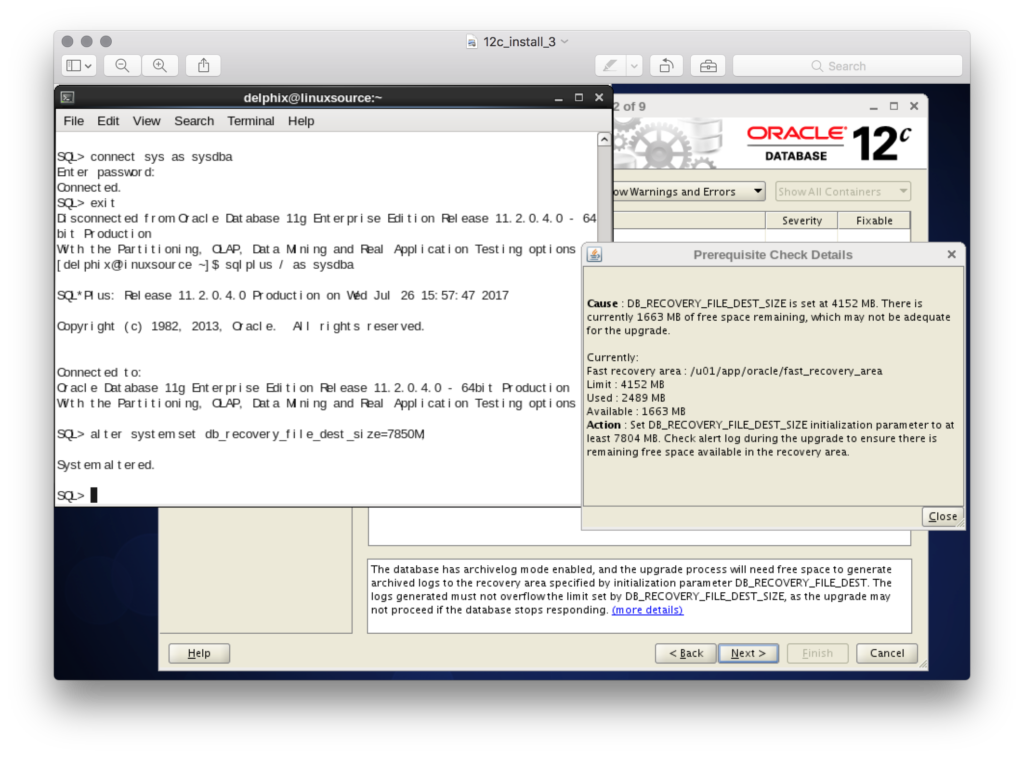
Log into SQL Plus as SYSDBA to perform this step:
ALTER SYSTEM SET DB_RECOVERY_FILE_DEST_SIZE=8100M;
Go through any warnings, but steps like stats collection and grants on triggers will have to be performed post the upgrade.
Drop the OLAP catalog:
$ sqlplus / as sysdba

@$ORACLE_HOME/olap/admin/catnoamd.sql

exit
Remove the OEM catalog for Enterprise Manager, first shutting down the console from the terminal:
$ emctl stop dbconsole
Copy the emremove.sql from the 12c Oracle Home/rdbms/admin and place it in the same location for 11g home. Log into SQL Plus as SYSDBA:
SET ECHO ON;

SET SERVEROUTPUT ON;

@$ORACLE_HOME/rdbms/admin/emremove.sql
Empty the recyclebin post these steps:
purge recyclebin;
The assumption is that you have a backup prepared or you can use flashback with your resources allocated and proceed forward with upgrade.
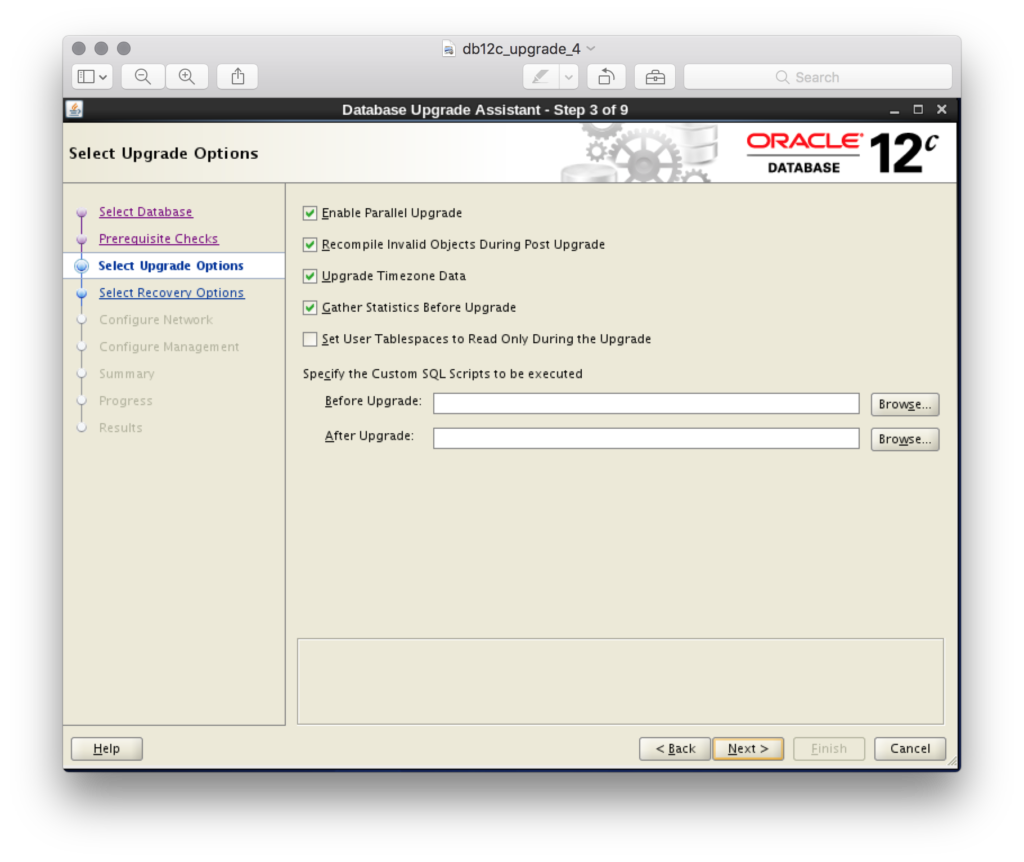
Choose to upgrade the 11g listener and choose to install EM Express if you’d like to have that for monitoring. Make sure to keep the default checks for the following window to update everything we need and collect stats before the upgrade runs to ensure it proceeds efficiently through all objects required.
Choose to proceed with the upgrade and if you’ve followed these instructions, you should find a successful installation of DB12c and upgrade of the database. Keep in mind, we’re not going to go multi-tenant in this upgrade example, so if you were looking for those steps, my POC I’m building isn’t going to take that on in this set of blog posts.
Post Upgrade Steps:
Update your environment variables, including copying the 11g.env to a new profile called 12c.env and updating the Oracle Home. Now set your environment and log into SQL Plus as SYSDBA to the upgraded database.
Update all the necessary dictionary and fixed stats:
EXECUTE DBMS_STATS.GATHER_DICTIONARY_STATS;

EXECUTE DBMS_STATS.GATHER_FIXED_OBJECTS_STATS;
Now, for our next post, we’ll need to set up the same installations on our Amazon host and VNC Viewer configuration we did for the Source and then install Oracle DB12c on our target server as we did in this post. Then we’ll discuss how to get all our Delphix VDBs, (virtual databases) upgraded to be the same as our source in no time!