OEM After Hours Notification Schedule Option- Part I
I came across a discussion on Oracle-l on how after hours paging was handled for many companies and was kind of surprised how many DBAs still carry around a secondary pager/cell phone or are just expected to be woke up if on call or not. I’m not one to go back to sleep once I’m woke, so I’ve been a proponent of EM notification schedules for after hours paging. Now there are other ways to handle this in Enterprise Manager 12c as well, but we’ll use this method, as it is backward compatible to OEM 10g, too.
The requirement of this setup is to have an inbox alerting option separate from your SMS/Texting option on your smartphone, which can be Android or iphone, even blackberry, any of these are more than acceptable to satisfy the requirement. The next is know your SMS notification email address.
Example- TMobiles would be <cell number>@tmomail.net and ATT would be <cell number>@mms.att.net.
Your mobile provider can verify what your email extension is for your SMS address. With this information in hand, you can then proceed with the setup. The design is simple- All email notification will continue to go to your email, no matter if warnings or critical, but we will create a secondary user that will have the SMS addresses for the DBAs oncall and set them up for a rotation to be notified of critical issues.
Sit down and first figure out how often you want to rotate your schedule, weekly, every two weeks, once per month and any vacation or time off coming up. That should tell you what your rotation needs to be to keep things sane.
Create the Paging User in Enterprise Manager
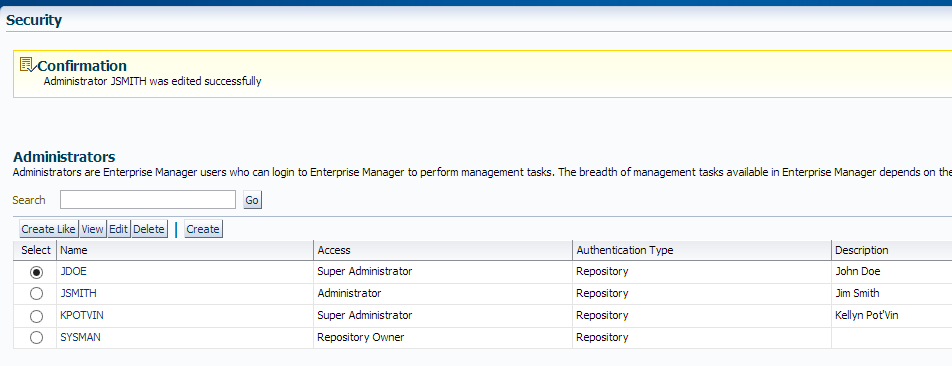
First we need to create the user that will then be utilized for paging. This can be done from the Setup, Security, Administrators menu in the console.
We have all our DBAs currently listed, but for this user, we will need each of their SMS addresses and once you have those, click on Create.
Name the user DBA_PAGE and put in the following values, and it can be set to an Administrator, but just for this example, I shortened the process and created it as a Super Admin, (this is not required…)
Note that I’ve entered each of the DBA’s SMS addresses into the Email Address section, separated by commas and that I’ve entered a clear description of what this login is used for.
Click on Finish and your new DBA_PAGE user is now listed.
Managing the DBA_PAGE User
Once you’ve completed the entry and then log out of the EM12c console as your current user and log back in as the DBA_PAGE user, (just easier to manage the notification schedule as this user…)
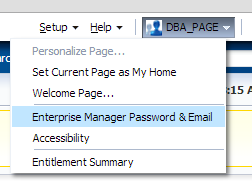
Next you need to create the notification schedule, but I’ll first show you how you can add more users easily to this Administrator:
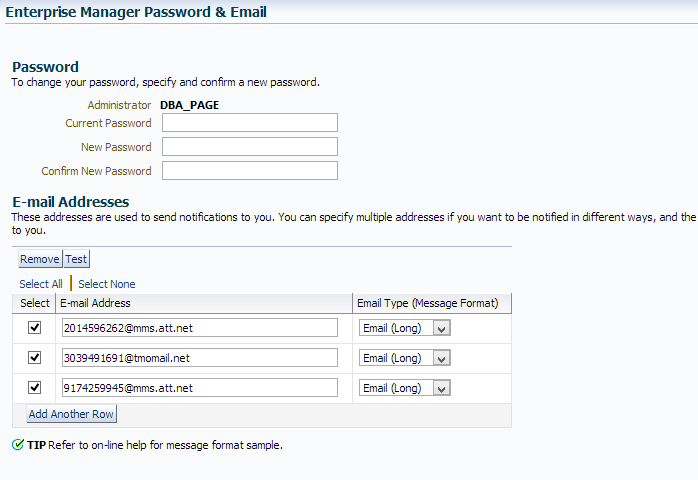
Once you’ve accessed this page, you will note that new email addresses can be added easily:
The Add Another Row option will allow you to add another SMS address and then you can check mark just that address and test it. You can also remove addresses from here of DBAs that have moved on from the company.
Editing the My Notification Schedule
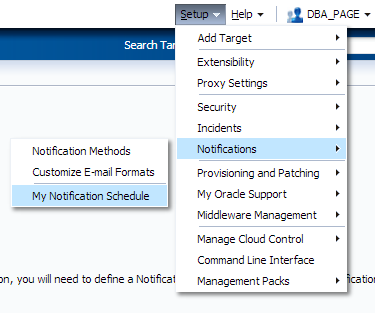
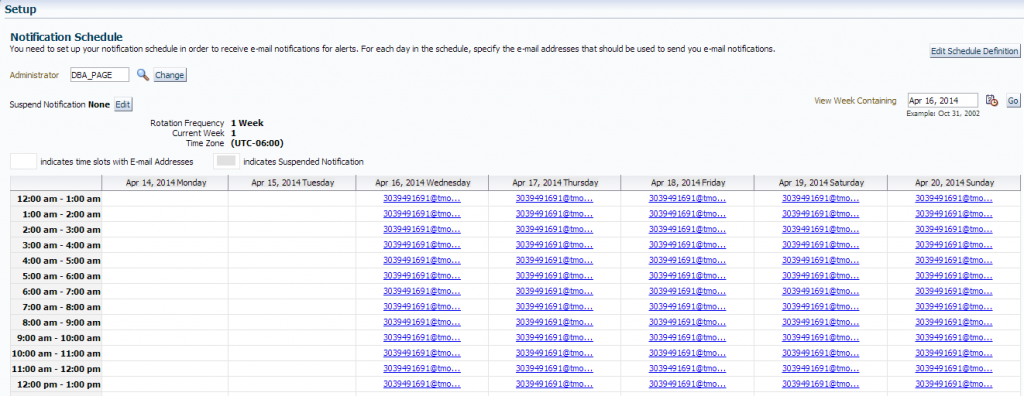
This is again accessed from the Setup menu on the right hand of screen and once you are in the My Notification Schedule, you will see the following:
This is the default schedule, starts from the day the user was created and would notify ALL email addresses in the list. We are going to replace this schedule with a new one that supports a three week rotation of oncall, notifying on one DBA each week, switching automatically each week to the next DBAs SMS address.
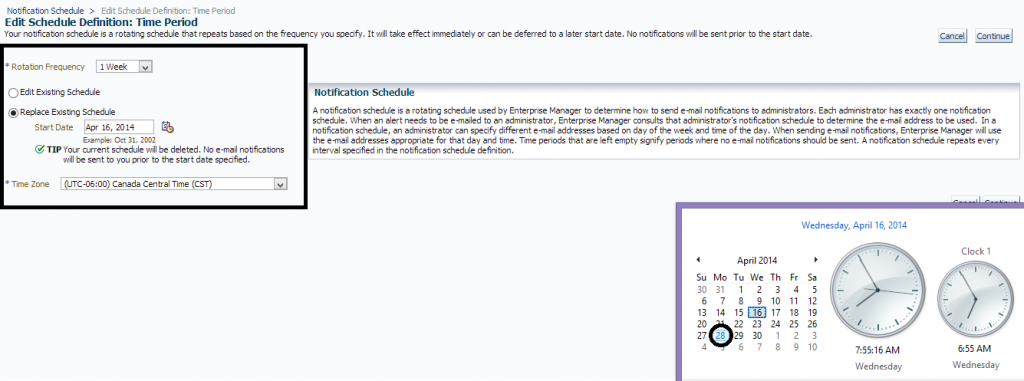
Click on Edit Schedule Definition in the upper right of the screen.
As starting a rotation in the middle of a schedule would be difficult, we are going to choose the following Monday as our beginning. You can see the default is a one week rotation and that the time zone is set to Canadian Central Time, (I have no idea where that came from… :))
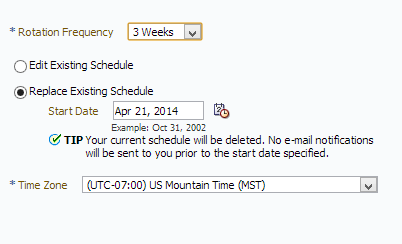
For our example, we are going for a three week rotation, (three DBAs, three week rotation… :)) We’ll start the rotation this following Monday, April 21st and we’re going to say that the DBAs are on Mountain Time.
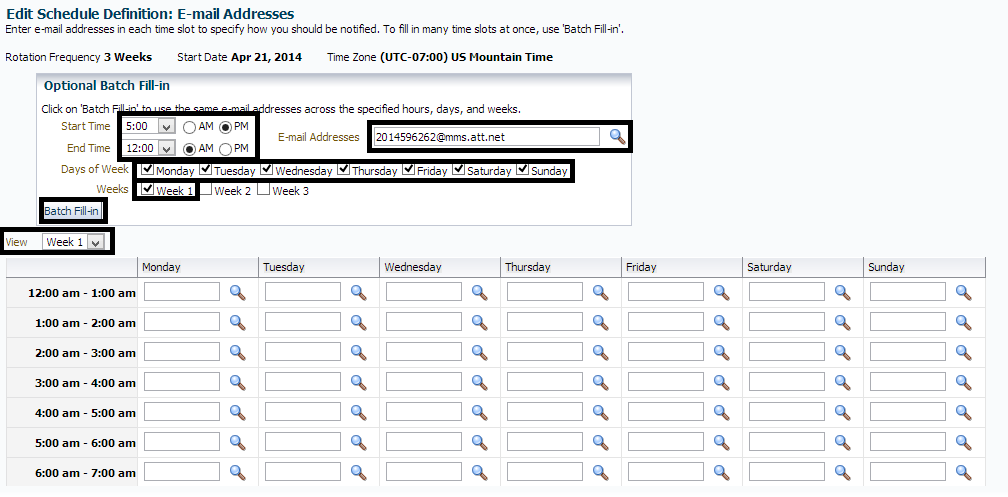
We are then given a schedule of three weeks to fill in for who is oncall. By default, it will want to offer us all three SMS addresses entered for the user. We will only use the first one, we will click on Week 1 to fill in, ensure we are VIEWING Week 1 and now to fill in our schedule.
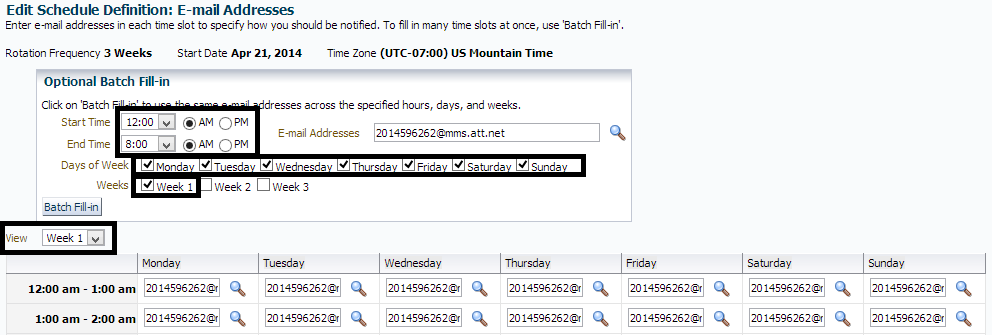
To create a schedule that DOES NOT notify during business hours, there is a batch file for each week of three steps. There is no way around this, so I’ll use the following schedule creation and then repeat it for the 2nd and 3rd week for the two other DBAs.
Now notice that we’re still viewing and editing week 1, and choosing all the days, but I’ve changed the time to show 12am-8am to fill in with the first DBA’s SMS address.
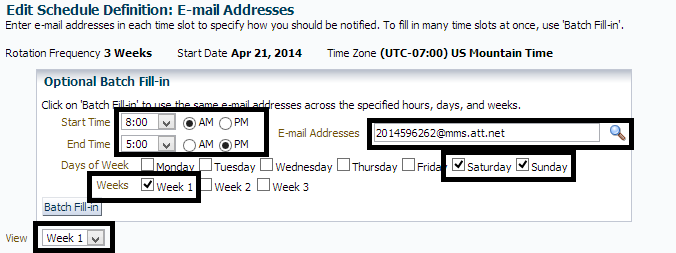
Finally, we fill in for the last time slot, Saturday and Sunday during the weekend daytime.
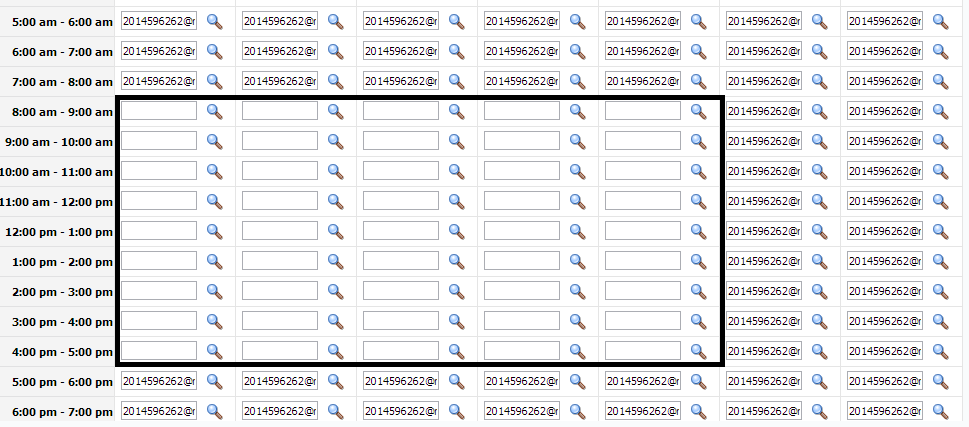
Your scheduled should now look something like this, with all sections above and below business hours filled in with the 1st DBA’s SMS Address for notifications:
We then will click on the down arrow button on the View menu and choose the second week, then do the same for the check mark in the box for Weeks, ensuring we are changing the schedule for Week 2. We’ll repeat the scheduling, but will also change the Email Address to the second DBA’s SMS Address by clicking on the search.
Once you have filled in everything for the Second DBA, you will switch to View Week 3 and edit Week 3 for the third DBA and fill in that schedule:
Once completed, Save the changes.
The default view may alarm you at first, as it will be empty:
The reason is the first date that is shown, which is the current date and if you remember from our example, we decided to start our rotation on April 21st. Go to the View Week Containing and change it to April 21st.
You will now see the rotation schedule for the first DBA for after hours.
Updating the date for the next week will display the 2nd DBA’s rotation:
And then if you switch the date to first week of May, we see the third DBA:
If you go past that, you’ll see that the rotation continues, starting again with the first DBA for the next week and will continue on without change unless you edit or replace the schedule.
If for some reason, let’s say a DBA can’t take a shift that is in their weekly schedule for one night, you can go into that DAY’s shift and edit it to one of the other two DBAs in the list.
Now you’ve finished setting up an after hours pager in a notification schedule. In Part II, I will show you how to use the notification schedule/user with rule sets to page on critical notifications.





This is a “must do” for any DBA who relies on OEM. It has helped me tremendously.
Hi Kellyn,
I am setting up notifications in OEM 12c (including phone SMS notifications), and I followed your steps: created a super admin (DBA_PAGING), given the T-Mobile e-mail extension (……@tmomail.net) setup the notification schedule and created the incident rule (for e-mail and phone text).
After having done all this, I tested for target availability (listener). I received the e-mail, but not the phone message. This is the second time I am testing, and the first time worked.
I appreciate any help.
Thank you,
Ioan