Swingbench is a one of the best choices for easy loads on a database. I wanted to use it against the SH sample schema I loaded into my Oracle Source database and I haven’t used Swingbench outside of the command line quite a while back, (my databases seem to always come with a load on them!) so it was time to update my Swingbench skills and catch up with the user interface. Thanks to Dominic Giles for keeping the download, features and documentation so well maintained.
After adding the application rights to run on my Macbook Pro, I was impressed by the clean and complete interface. I wanted to connect it to my AWS instance and as we talk about, the cloud is a lot simpler a change than most DBAs first consider.
When first accessing, Swingbench will prompt you to choose what pre-configured workload you’d like to utilize. I had already set up the Sales History schema in my AWS Trial source database, so I chose Sales History and then had to perform a few simple configurations to get it to run.
Username: sh

Password: <password for your sh user>

Connect String: <IP Address for AWS Instance>:<DB Port>:<services name>
Proceed down to the tab for Environment Variables and add the following:
ORACLE_HOME <Oracle Home>
I chose the default 16 connections to start out, but you can add more if you’d like. You can also configure stats collection, snapshot collection before and after the workload.
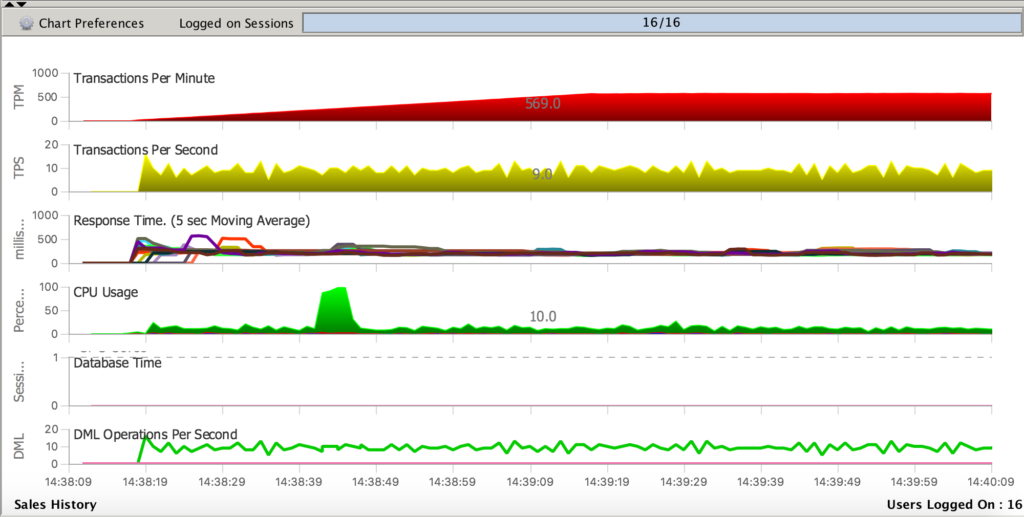
I set my autoconnect to true, but the default is to not start the load until you hit the green arrow button. The load will then execute the workload with the amount of connections requested until you hit the red stop button. You should see the users logged in at the bottom right and in the events window:
Next post we’ll discuss what you’ll see when running a Swingbench on a source database, the Delphix Engine host and subsequently refreshes to a VDB, (virtual database.) We’ll also discuss other tools that can grant you visibility to optimization opportunities in the cloud.


