I always like to start with something easy, or at least easy for me… 🙂
ChatGPT, using GPT4 is moving fast and at this point, we can test it to generate code that will replace much of what I would write in a BASH, Python or PowerShell script.
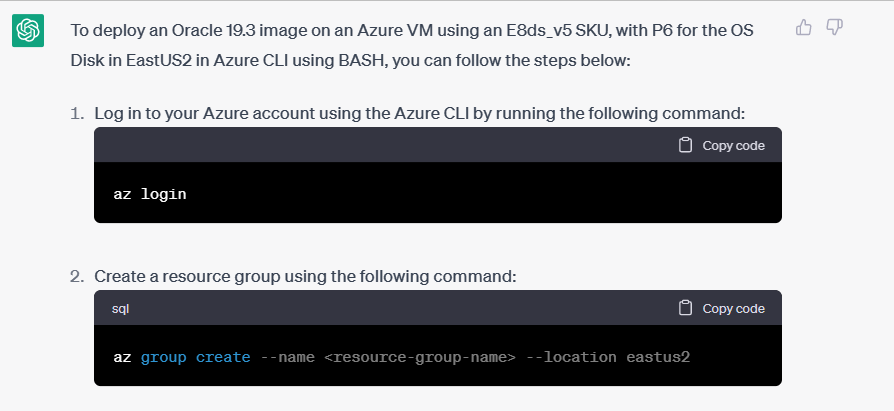
The prompt in ChatGPT was as follows: “Deploy Oracle 19.3 image on an Azure VM, using an E8ds_v5 SKU, with P6 for the OS Disk in EastUS2 in Azure CLI using BASH”
ChatGPT is good about using natural language in it’s output to parse through each step and include the code that I would require. It’s not perfect, but it’s improving every day vs. what is was able to do just a couple months ago with GPT3.5/3.0
3. Replace <resource-group-name> with the name you want to give to your resource group.
4. Create a virtual network and subnet using the following commands:
az network nsg create --name <nsg-name> --resource-group <resource-group-name>
az network nsg rule create --name allow-ssh --nsg-name <nsg-name> --priority 100 --resource-group <resource-group-name> --access Allow --protocol Tcp --direction Inbound --source-address-prefixes "*" --source-port-ranges "*" --destination-address-prefixes "*" --destination-port-ranges 22
5. Replace <vnet-name> and <subnet-name> with the names you want to give to your virtual network and subnet, respectively.
What’s interesting here, is that ChatGPT refers to the SUBNET, but doesn’t have it in it’s commands. This is where it went wrong the first time.
6. Create a network security group and allow inbound traffic on port 22 (SSH) using the following commands:
az network nsg create --name <nsg-name> --resource-group <resource-group-name>
az network nsg rule create --name allow-ssh --nsg-name <nsg-name> --priority 100 --resource-group <resource-group-name> --access Allow --protocol Tcp --direction Inbound --source-address-prefixes "*" --source-port-ranges "*" --destination-address-prefixes "*" --destination-port-ranges 22
7. Replace <nsg-name> with the name you want to give to your network security group.
8. Create a public IP address using the following command:
az network public-ip create --name <public-ip-name> --resource-group <resource-group-name> --sku Standard --allocation-method Static
9. Replace <public-ip-name> with the name you want to give to your public IP address.
10. Create a virtual machine using the following command:
az vm create \
--resource-group <resource-group-name> \
--name <vm-name> \
--image Oracle:Oracle-Linux:7.8:7.8.20201217 \
--admin-username <admin-username> \
--size Standard_E8ds_v4 \
--authentication-type ssh \
--ssh-key-values <path-to-public-ssh-key> \
--public-ip-address <public-ip-name> \
--nsg <nsg-name> \
--vnet-name <vnet-name> \
--subnet <subnet-name> \
--os-disk-size-gb 64 \
--os-disk-name <os-disk-name> \
--storage-sku P6 \
--boot-diagnostics-storage <boot-diagnostics-storage-account-name>
11.Replace <vm-name> and <admin-username> with the name and username you want to give to your virtual machine and your admin username, respectively. Replace <path-to-public-ssh-key> with the path to your public SSH key. Replace <os-disk-name> with the name you want to give to your OS disk. Replace <boot-diagnostics-storage-account-name> with the name of your boot diagnostics storage account.
Note that in this command, we are using the Oracle Linux 7.8 image and the Standard_E8ds_v4 size, as there is no E8ds


One comment on “ChatGPT – Oracle Deployment in Azure via Azure CLI”
Comments are closed.