
Supporting Your Virtual VMs, Post II, PC and VM/Image Settings
I’m in the midst of transferring over to my travel laptop to run all my VMs on and retiring my previous ASUS work laptop to my youngest son. I was surprised to find out that not ALL laptops are set up to run virtual environments these days.
1. Virtualization may not be enabled in the BIOS, (i.e. On-Boot UEFI in the Lenovo Yoga 11s.)
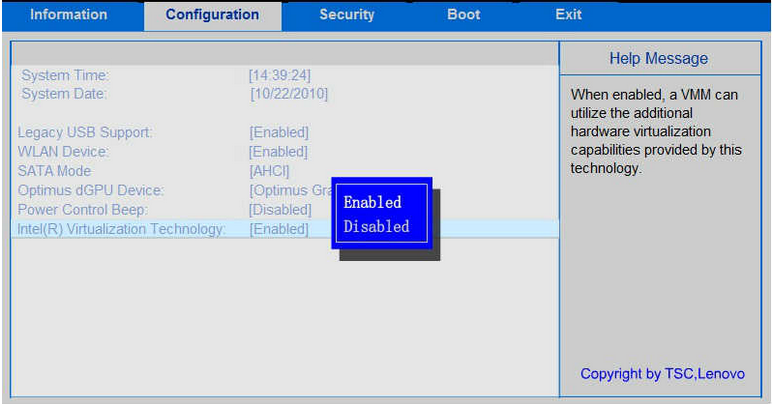
Once this is enabled, save the configuration and reboot, allowing you to now run a VM on your laptop.
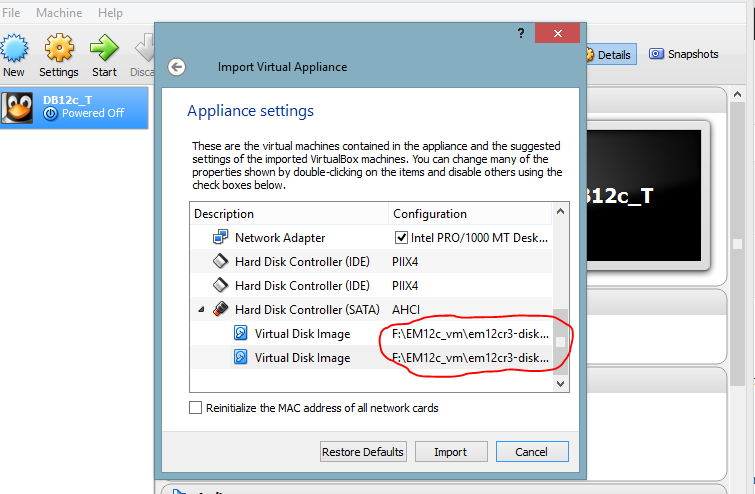
If you are importing appliances, make sure you have set the location to import the disks to the appropriate location, especially if you are using an external disk to house your VMs.
Before you click, “Import”, look at the very bottom where the location of the virtual disk will reside and verify that is where you want them to live. The default is commonly the data location for the PC user on Windows or the /home/user for Linux users.
Now onto the VM
2. All VM images are not the same. If you are using an image file or have created the image from scratch, be prepared to do some preparation to get the image ready before you can successfully install Oracle on it and/or any other product such as Enterprise Manager, etc.
The nicest part is that Oracle will let you know what is wrong in its prereq checks during the installation of Oracle. It’s going to let you know if your OS and virtual host has what it takes to support the installation-
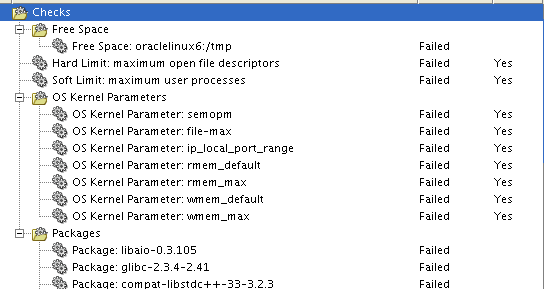
Most of these are pretty straight forward for anyone who’s installed Oracle for awhile, maybe not for those that are newer to the product.
1. Most VM images have a small /tmp and/or it can be filled quickly by installation.
- clear out files from /tmp after each installation or in this case, failed install.
- create a soft link to point to a second temp directory that has more space and make it the default temporary directory.
2. Increase is the swapfile space. This can be created in a location you have space to reserve and read/write swap to. On our VM, we’re kind of limited at the moment, so we’re just going to create a swapfile off of /u01 and give it 2GB of space:
dd if=/dev/zero of=/u01/swapfile bs=1024 count=2097152
mkswap /u01/swapfile
swapon /u01/swapfile
swapon -a
3. Hard limit/soft limit- These can be fixed by the following inside your VM, most of the steps must be performed as ROOT, but verify if it’s looking for ROOT to perform or a check as the OS user-
Next, we’re alerted that the max open file descriptors is an issue, so let’s look at those for the system, the user and then increase them:
cat /proc/sys/fs/file-max
Do as the user!!
ulimit -Hn
4096
ulimit -Sn
1024
We’ve now verified that they are smaller than the requested amount, (in our installation, it requested 65536) so we’ll add this and then verify the change in the file-
sysctl -w fs.file-max=65536
vi /etc/sysctl.conf
We can also simply append to file, (as ROOT):
fs.file-max = 100000
Now save and verify with the following:
sysctl -p
Log out and log back in to set the new values.
Next post we’ll take on all those darn lib files… 🙂
Pingback: Supporting Your Virtual VMs, Post II, PC and VM/Image Settings - Oracle - Oracle - Toad World