A common issue I’ve noted are dump files generated from the AWR Warehouse, but upon failure to transfer, the dumpfiles simply exist, never upload and the data is stuck in a “limbo” state between the source database, (target) and the AWR Warehouse. This can be a very difficult issue to troubleshoot, as no errors are seen in the actual AWR Warehouse “View Errors” and no data from the source is present in the AWR Warehouse.
Empowered by EM Jobs
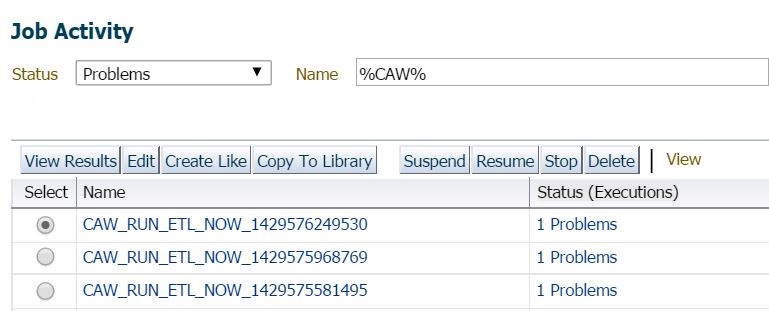
If you go to Enterprise –> Jobs –> Activity and inspect the Log Report after a search for %CAW% jobs that perform the extraction, transfer and load that experienced a problem, you will then be able to view the error and can inspect the details of the issue.
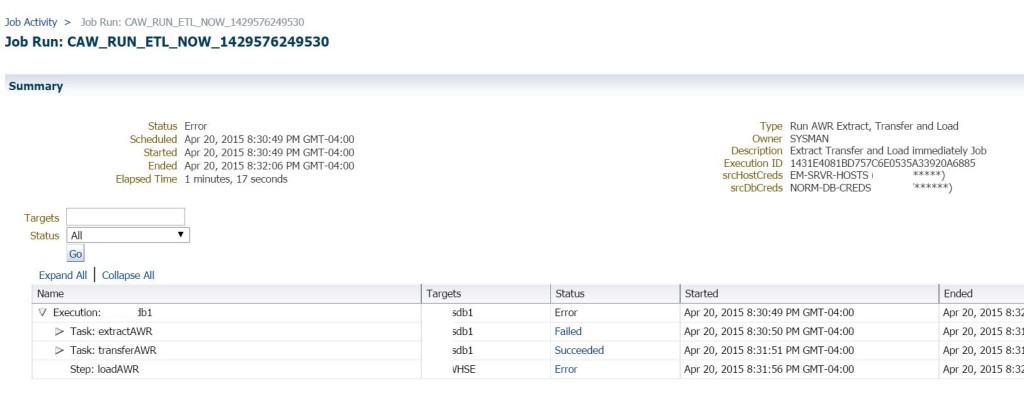
If you double click on the job in question and note in the example above, you’ll notice that the jobs have the naming convention of CAW_RUN_ETL_NOW. This is due to a force run via the AWR Warehouse console, (Actions –> Upload Snapshots Now.) If the job was a standard ETL run, the naming convention will be CAW_TRANSFER.
The job is a multi-step process, so you will see where the extraction step failed. This is a bit misleading, as the previous failure that set into motion was a preferred credential issue that stopped the transfer step to the AWR Warehouse. If you look far enough back in the jobs, you’ll find the original error, but now we are stuck in a loop- the source can’t go forward once the credentials are fixed and yet it’s difficult for someone unfamiliar with the process to know where it all went wrong. The first recommendation is often to remove the database and re-add it, but in this scenario, we are going to kickstart the process now that the credentials have been fixed.
Digging into a Job Error
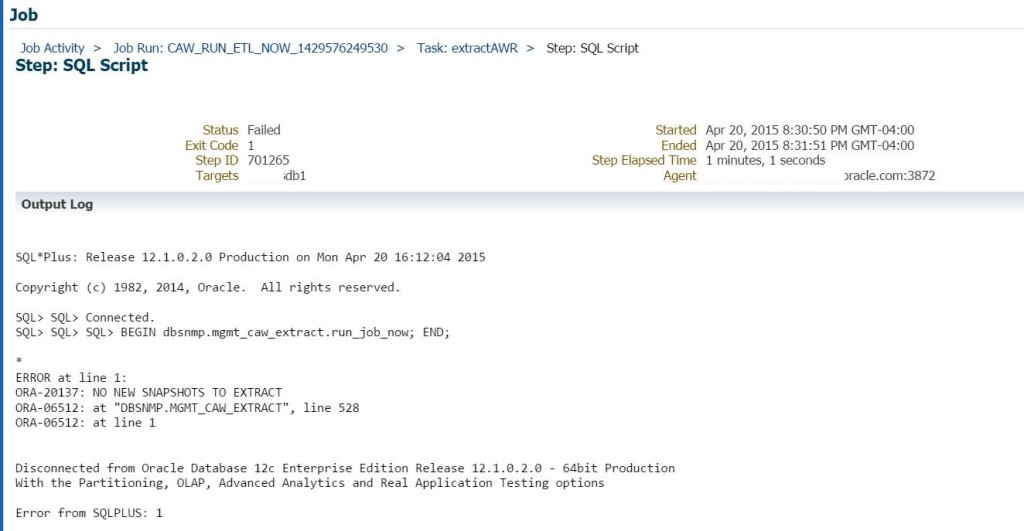
As we stated earlier, you’ll see in the steps, that the extract failed, but the transfer would have been successful if a file had been created. Double click on “Failed” to see the error that occurred:
In the SQL output, the error states, ORA-20137: NO NEW SNAPSHOTS TO EXTRACT
Now we know that no files have been uploaded to the AWR Warehouse, yet, the logic written to the AWR Warehouse package that is in the DBNSMP schema in the source database thinks it’s already pulled all of these snapshots to an extract and created a dumpfile. This error is very clear in telling the user what is going on. There is a data telling the ETL process the data ALREADY has been extracted.
Disclaimer: This solution we are about to undertake is for a BRAND NEW ADDITION TO THE AWR WAREHOUSE ONLY. You wouldn’t want to perform this on a source database that had been loading properly and then stopped after successful uploads to the warehouse, (if you have one of those, I would want to proceed differently, so please keep this in mind before you attempt this in your own environment….) This fix is also dependent upon all preferred credential issues to be resolved BEFOREHAND.
The Kickstart
To “kickstart” the process after a failure, first, verify that there are no errors that aren’t displaying in the console:
select * from dbsnmp.caw_extract_metadata;
Next, gather the location for the dumpfiles:
select * from dbsnmp.caw_extract_properties;
There will be one line in this table- It will include the oldest snapID, the newestID and the location of the dumpfile, (often the agent home unless otherwise configured.) This is the table the logic in the package is using to verify what has been already extracted. We now need to remove this tracking information and the pre-existing dumpfiles created in the previous failed processes:
- Make a copy of this table, (create table dbsnmp.caw_extract_prop2 as select * from dbsnmp.caw_extract_properties;)
- Truncate dbsnmp.caw_extract_properties table.
- Delete the extract, (dumpfiles) from the directory shown in the caw_extract_properties table. Don’t remove anything else from that directory!
- Log into the AWR Warehouse console.
- Click on the source database you just scoured of the ETL extract files.
- Highlight the database, click on Actions, Click on “Upload Snapshots Now.”
- View the job via the link displayed at the top of the console and monitor to completion.
- Once the job has succeeded completely, remove the dbsnmp.caw_extract_prop2 table and the backup files you moved that were created earlier from failed extracts.
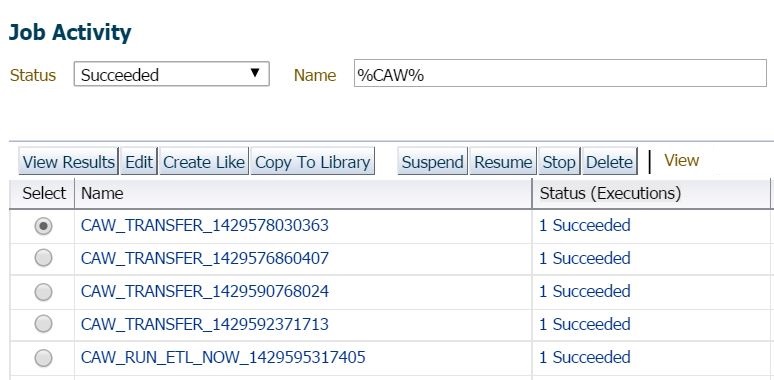
You should now see successful upload jobs from this point on in the job, along with data in your AWR Wareshouse:


The article is awesome. Thanks.
I have the quick question.
How can I change the directory where it write the dump files too.
I don’t want it to write to:
/u01/app/oracle/product/oem12c/agent/agent_inst