
The sales, support and technical teams were brought into the Denver Tech Center office to do some advanced training in Hybrid Cloud. There were many take-aways from the days we spent in the office, (which is saying a lot- most of you likely know how much I hate working anywhere but from home… :)) and I thought I would share a bit of this information with those that are aching for more details on this new and impressive offering from release 5.
If you’re new to Hybrid Cloud and want to know the high level info, please see my blog post on the topic.
Cloud Control Cloning Options
Cloud Control now includes a number of new options for database targets in EM12c. These new drop down options include cloning to ease access to the new hybrid cloning. Once you’ve logged into Cloud Control, go to Targets à Databases and then choose a database you wish to implement cloning features for. Right click on the target and the drop downs will take you to the cloning options under Oracle Database –> Cloning.
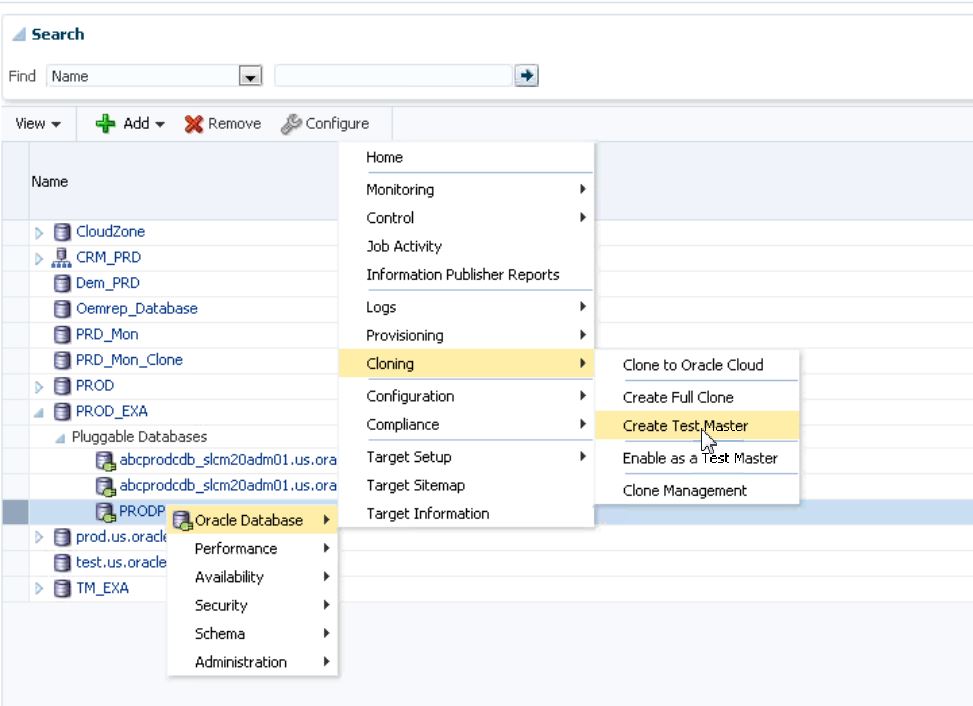
There will be the following choices from this drop down:
- Clone to Oracle Cloud- ability to directly clone to the cloud from an on-premise database.
- Create Full Clone- Full clone from an image copy or an RMAN backup.
- Create Test Master- Create a read-only test master database from the source target.
- Enable as a Test Master- Use the database target as a test master, which will render it read-only and it would rarely be an option for a production database.
- Clone Management- Manage existing cloning options.
Using a test master is essential for snap clones, which are a great way to offer great space savings and eliminates the time that is required for standard cloning processes. The test master is in a read only mode, so it will need to be refreshed or recreated with an up to date copy, (which will then be another option in the drop down, “Disable Test Master”) for new cloning procedures.
Snapshot Clone
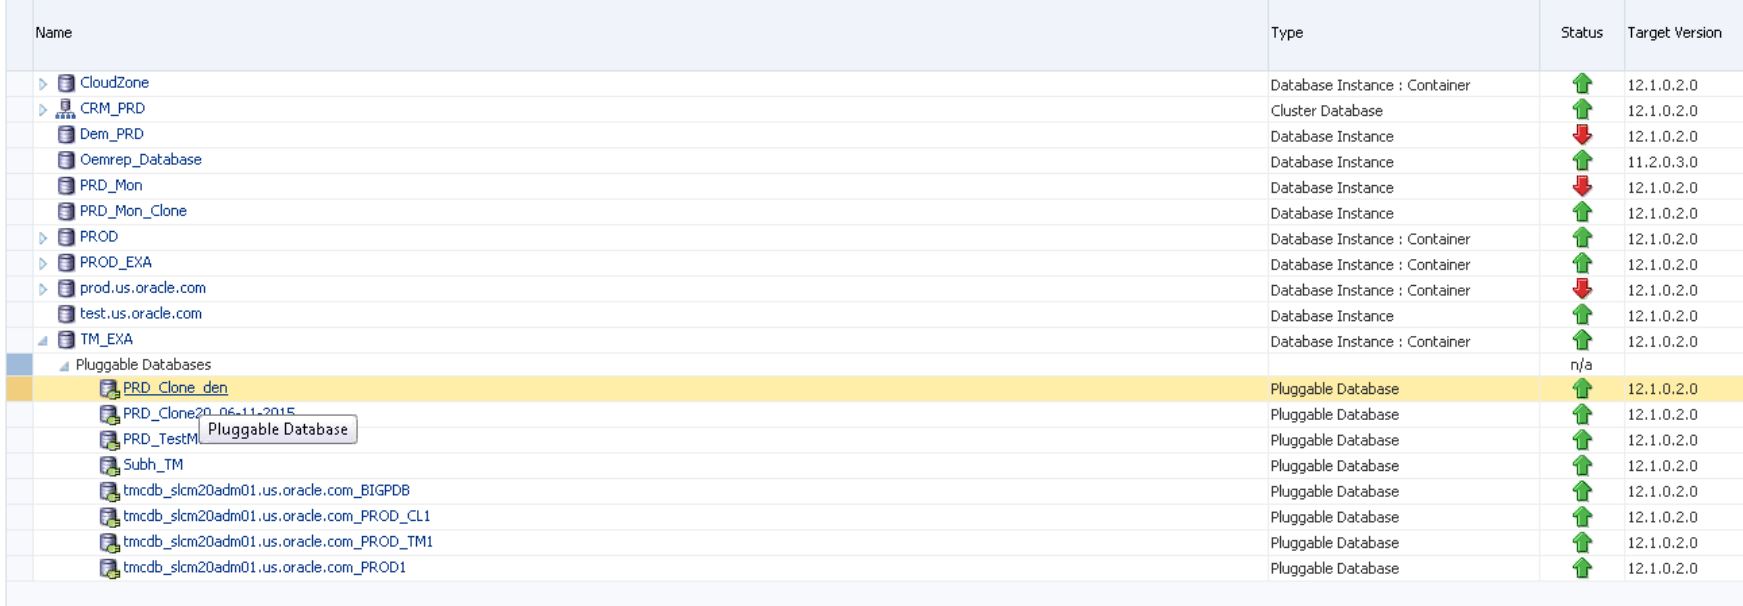
For the example today, we’ll use the following production database:
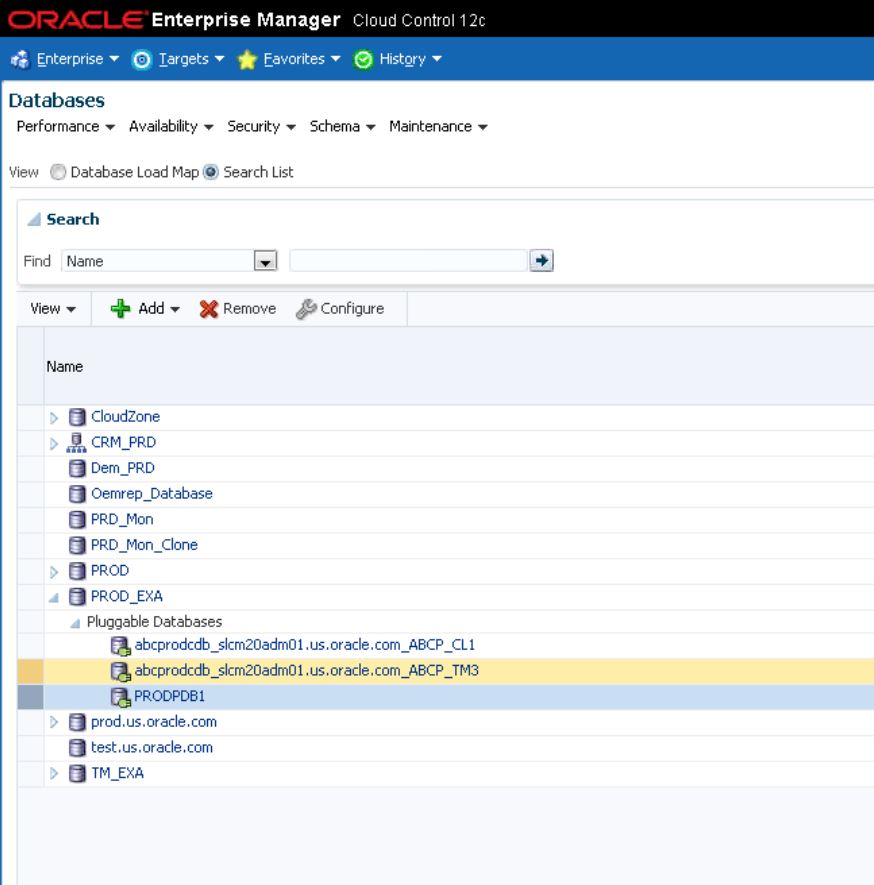
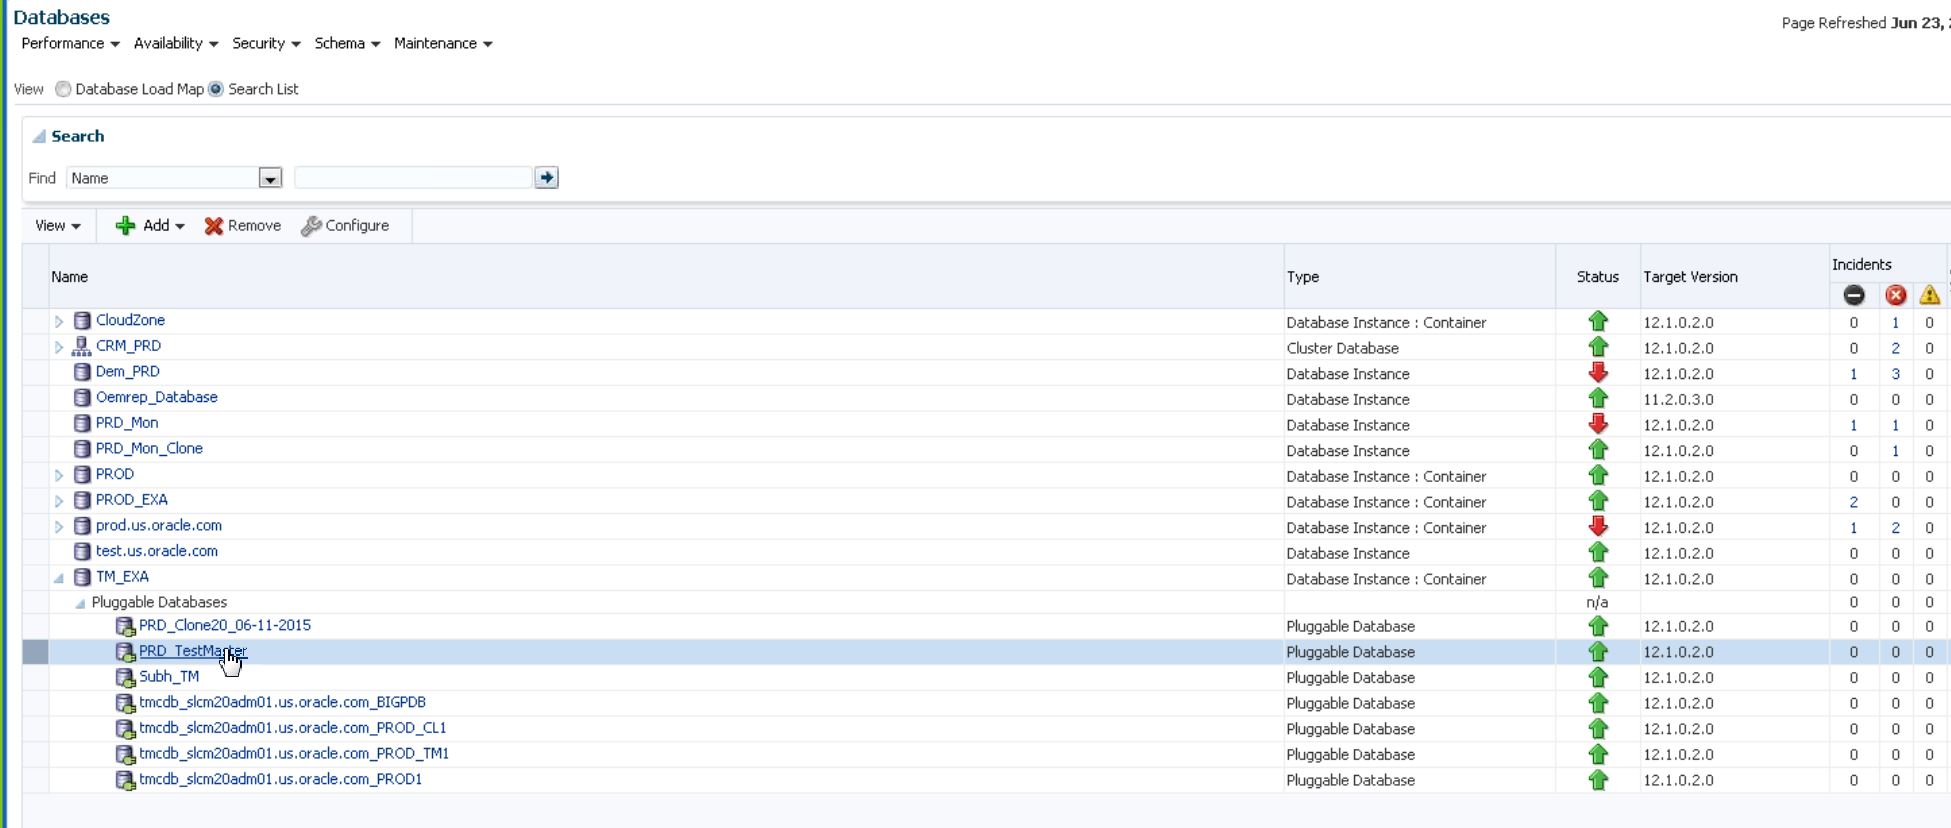
We’ll use an existing test master database to perform our clone from:
We can right click on the database and choose to create a clone. This is going to be an artifact via a snapclone, so keep this in mind as we inspect the times and results of this process.
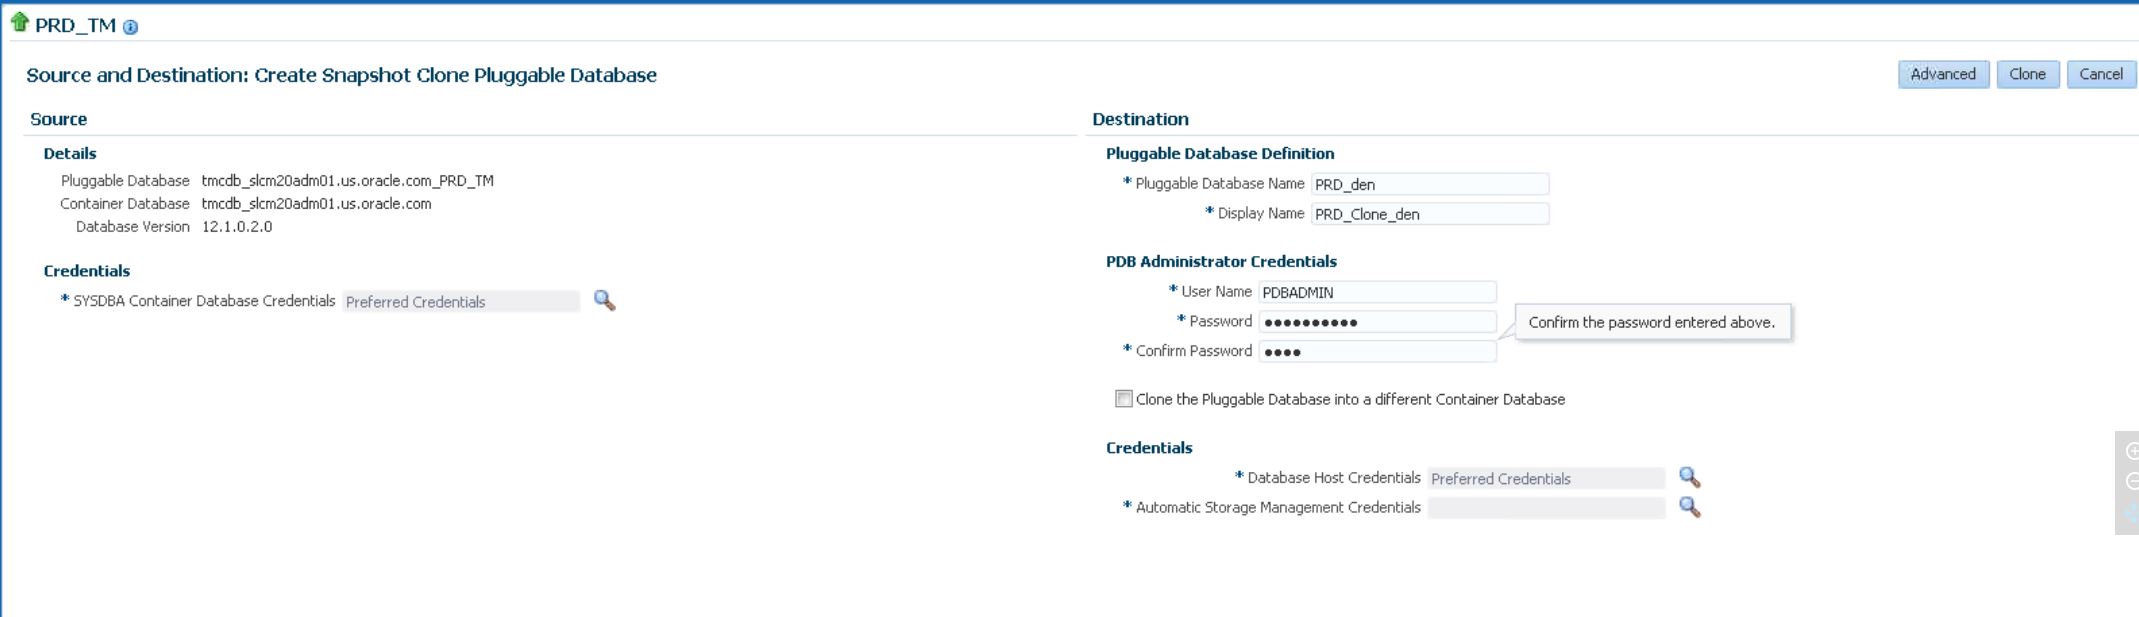
Upon choosing to create a snapshot clone of a pluggable database. This will then create snapshot clone, each clone is just a copy of the file header with block changes involved on the read only or read-write clone.
Once you fill out the pertinent data for the clone, using the correct preferred credentials with SYSDBA privileges, name the new pluggable database, the name you’d like it displayed in Cloud Control as and enter the PDB administration credentials, password and confirm the password. Once that’s done, choose if you’d like to clone it to a different container, (CDB) than what the source resides on and then add the database host and ASM credentials.
Once you click next, you have more advanced options to view and/or setup:
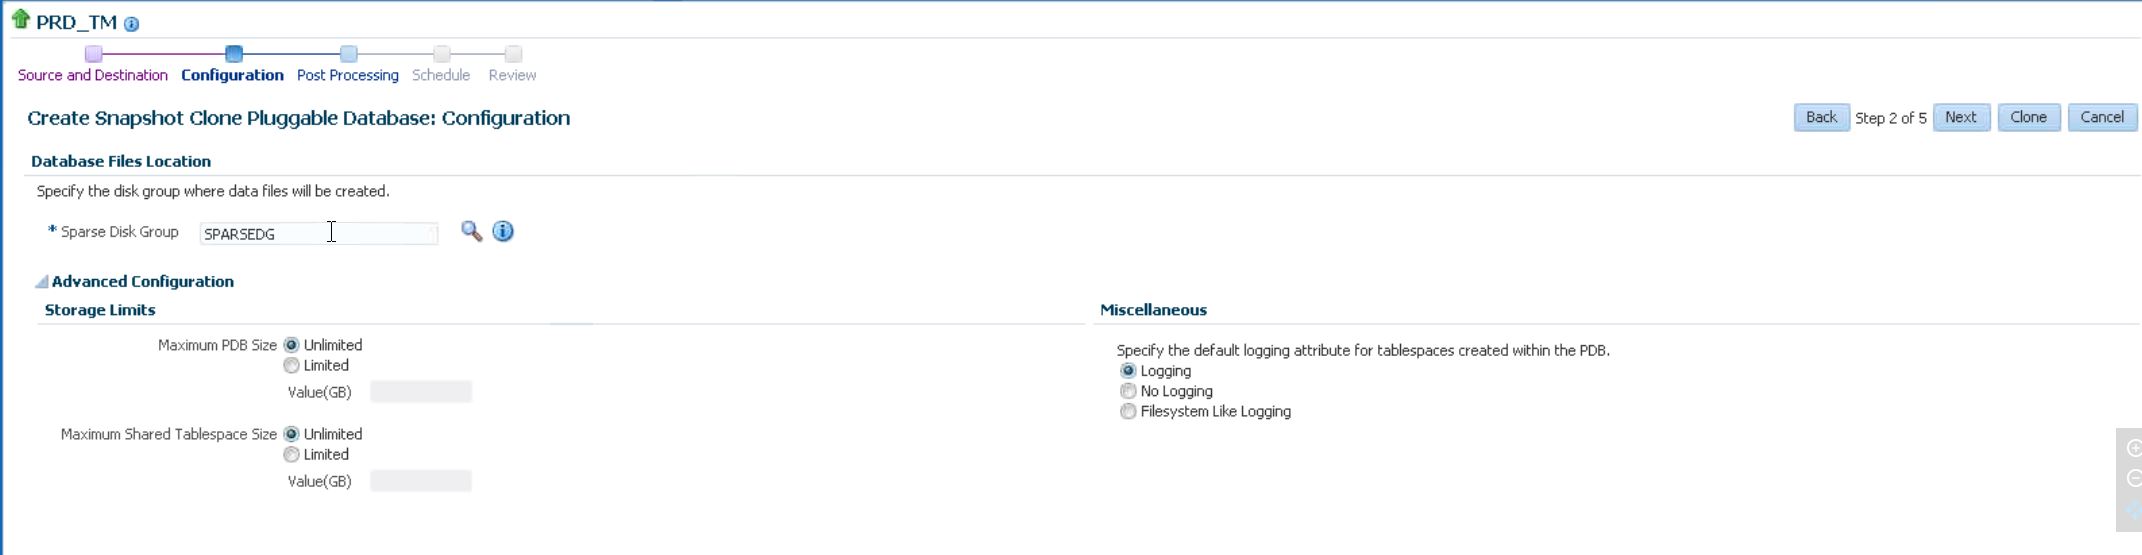
The advanced options allow you to change the sparse disk group to create the clone on, storage limits and database options.
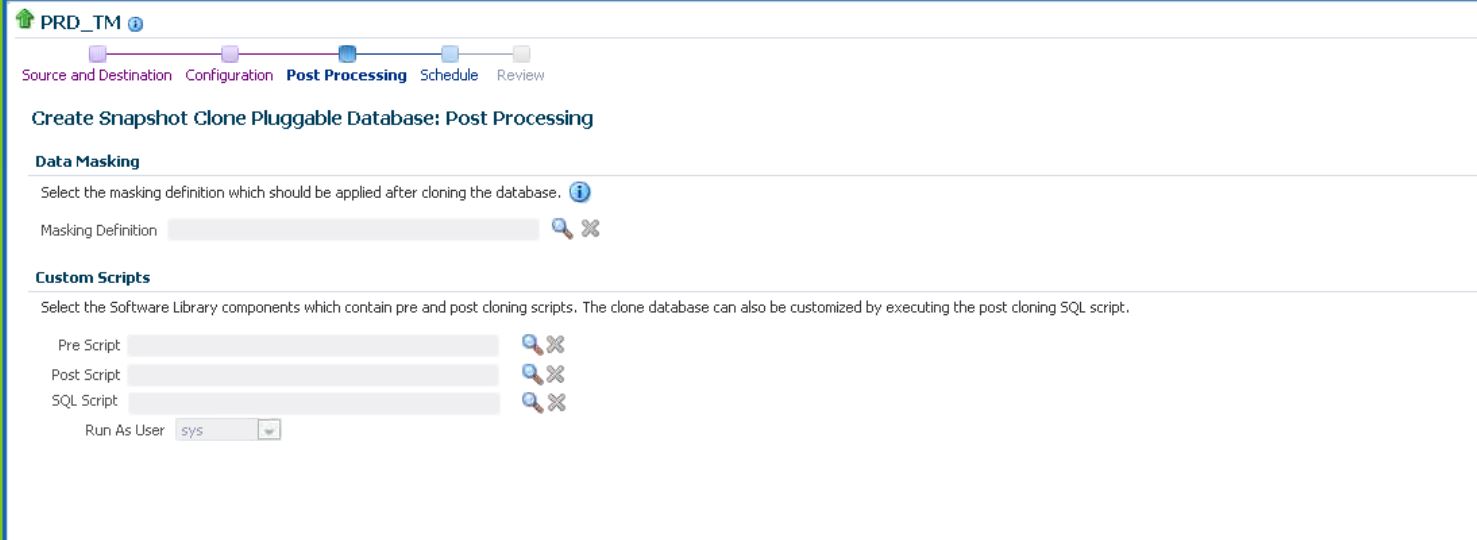
You can then choose to have data masking to protect any sensitive data, but keep in mind, once you do so, you will no longer be using a snapclone due to the masking, but the option to implement it at this step is an option. You can also set up any pre, post or SQL scripts that need to be run as part of the clone. This could include resetting sequences, user passwords, etc.
The next step allows you to schedule the clone in the future or run immediately.

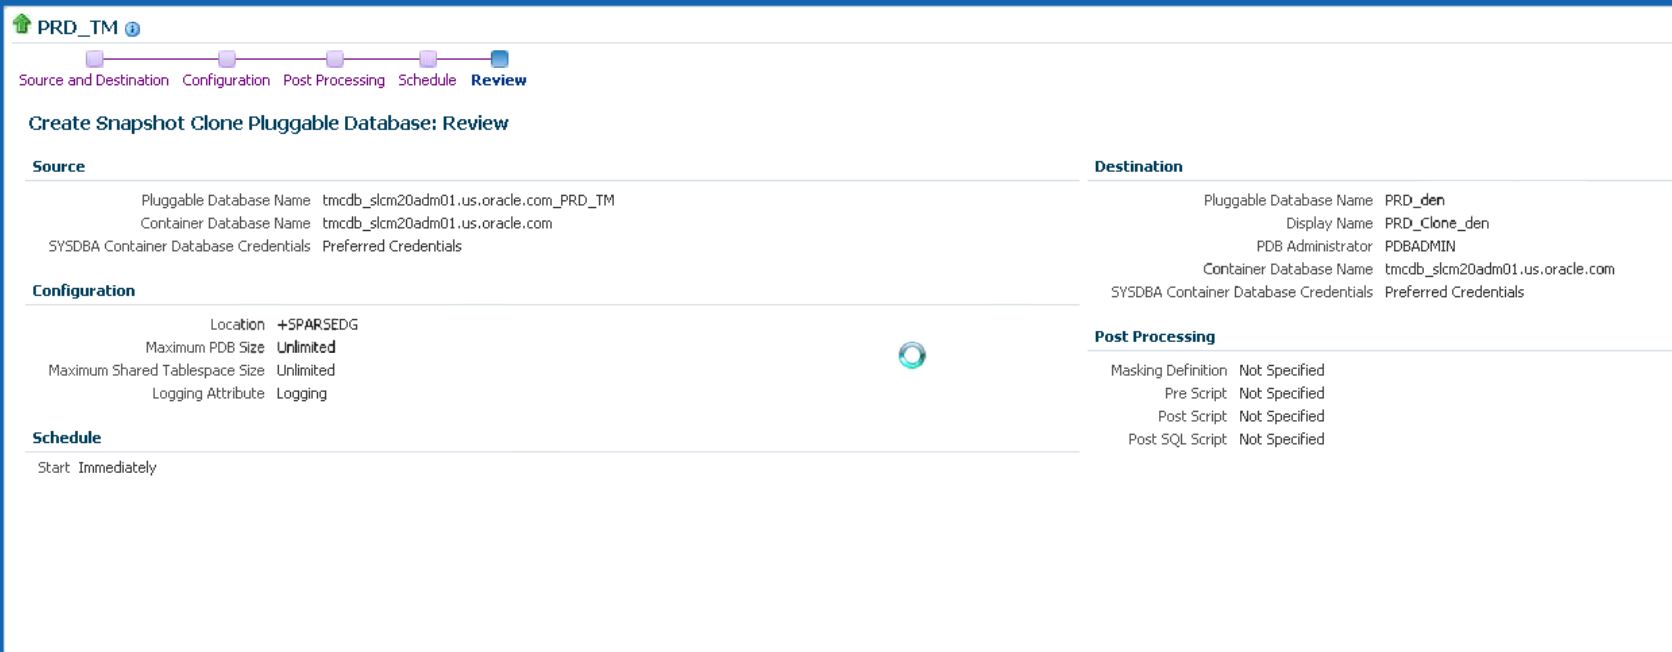
You can also choose the type of notifications, as this is simply an EM Job that is submitted to perform the cloning process. Once you’ve reviewed the cloning steps chosen via the wizard, you can then submit.
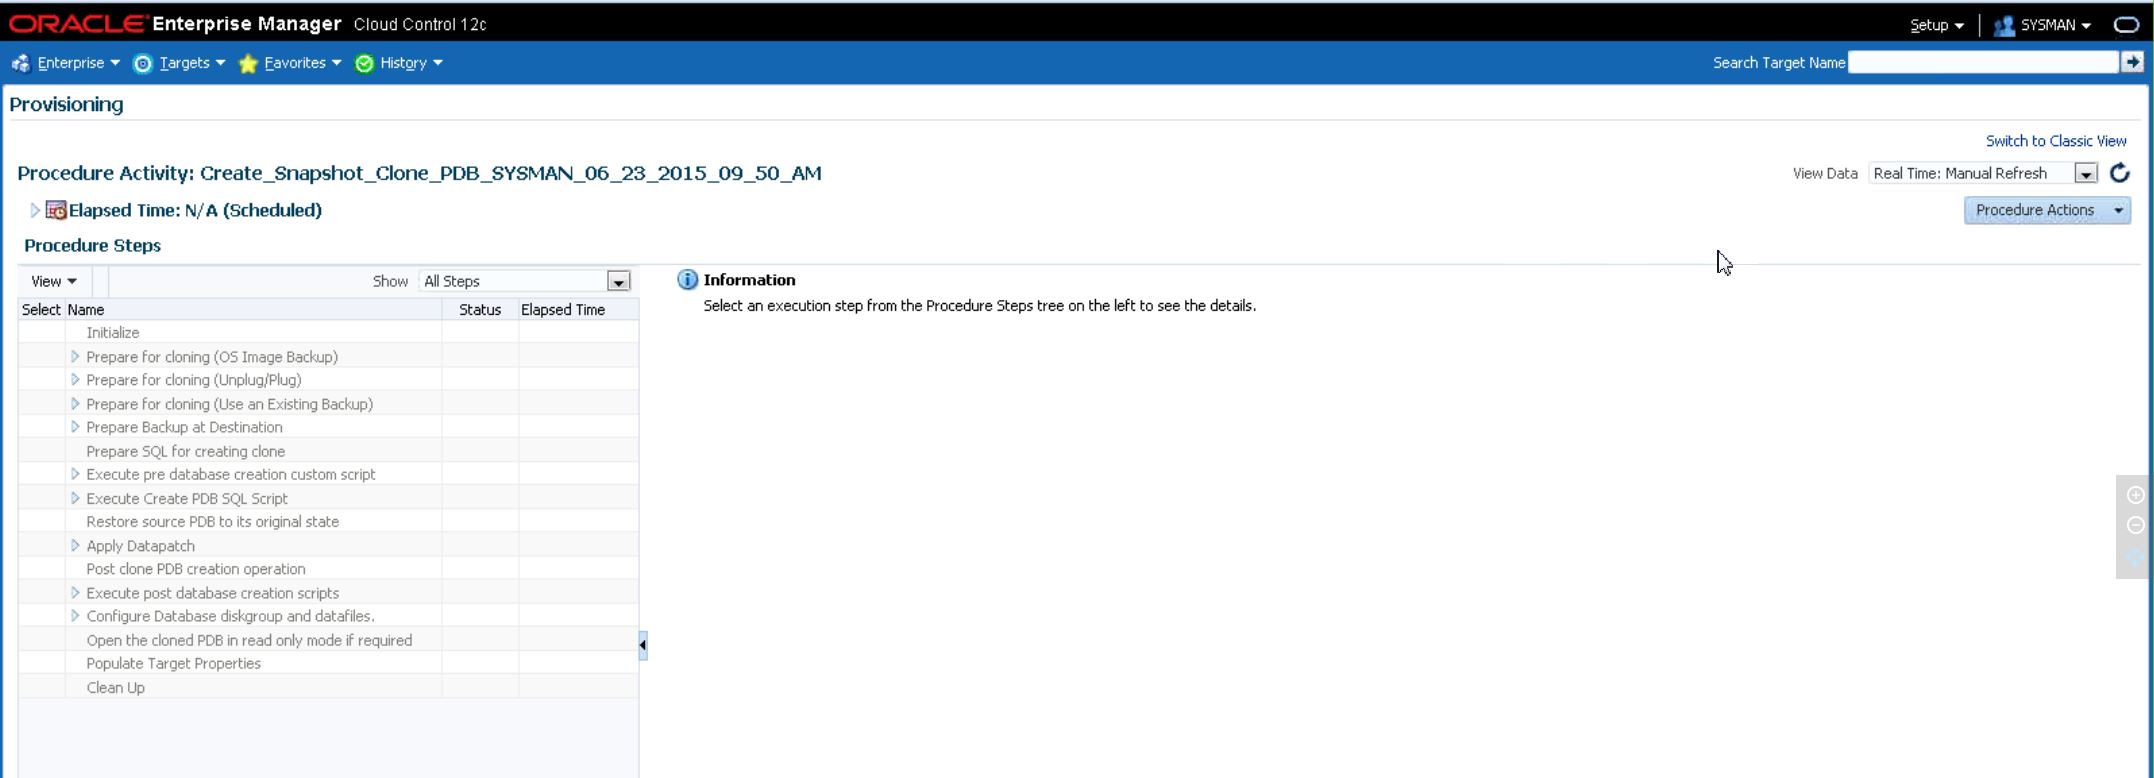
Once the jobs been submitted, the submitter can monitor the job steps:
Success
Once the clone has completed, you can view each of the steps, including the time each took.

The source database was over 500 GB and was cloned in less than one minute! You also will see the new cloned database in the targets list:
If curious, note that this is a fully cloned database that is on ASM, which you can view, just as you would for any other database.
Again, note the size and that this can be managed like any other database that you would have created via a DBCA template or through a standard creation process.

More to come soon and thanks to Oracle for letting us get our hands on the new 12.1.0.5 hybrid cloning!
Finished upgrade to EM 12.1.0.5. Time to play with new features 🙂