
It’s finally time to upgrade our Linux Target! OK, so we’re not going to upgrade the way a DBA would normally upgrade a database server when we’re working with virtualization.

So far, we’ve completed:
- 1. Updating our instances so that we’ll have a GUI interface if we’ll need one.
- 2. Installed Oracle on the Linux Source and upgraded our Dsource database to 12c
Now we’re done with our Linux Source and onto our Linux Target.
Install and Configure VNC and Oracle
We’ll run through and install and configure the VNC Viewer requirements just like we did in Part I and Part II. We’ll also install Oracle, but only this time, we’ve performed a software installation only.
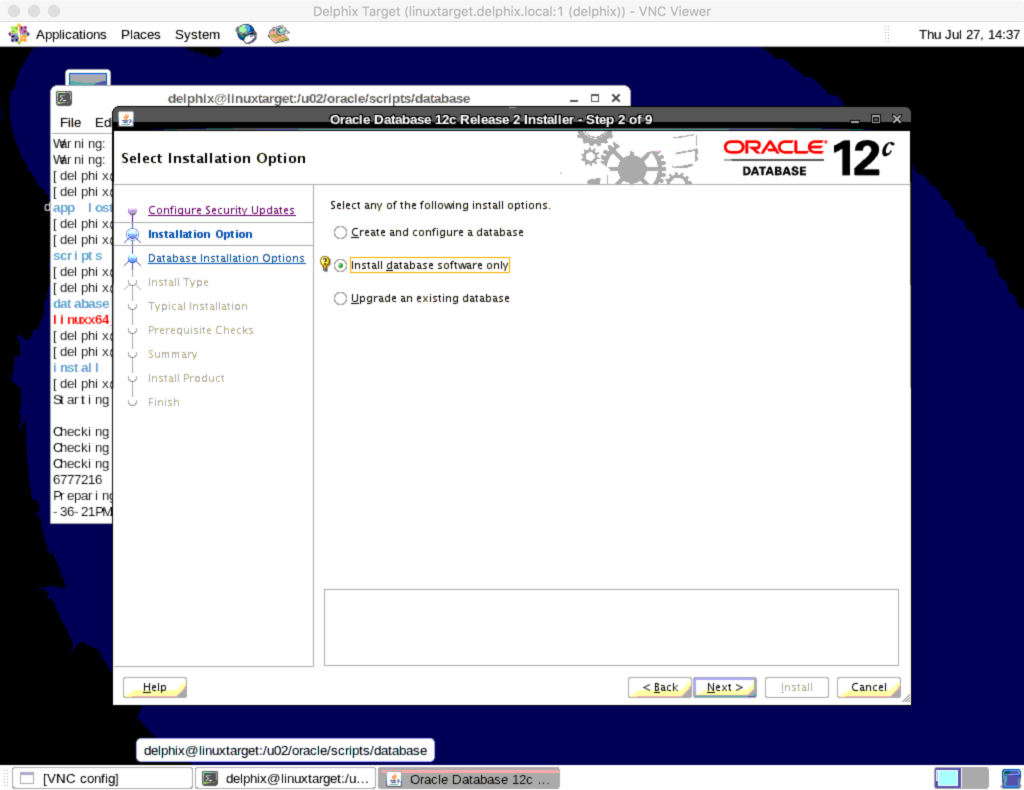
We’ll install the Enterprise Edition and we’ll make sure to install it in the same path as we did on our Linux Source, (/u01/app/oracle/product/12.1/db_1) We’re not installing the multi-tenant, as we didn’t configure this on our source, either.
Once that is complete, it’s time to get our VDB’s upgraded.
The first thing you need to remember is that the VDBs are simply virtual images of our Dsource that is already UPGRADED.
Add the New Oracle Home to the Linux Target
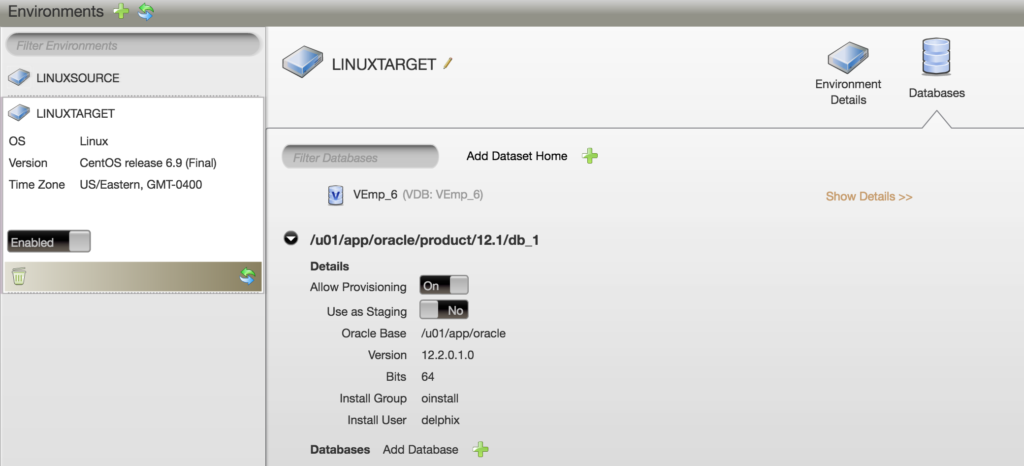
Log into Delphix Admin Console and click on Environments.
click on the Linux Target and then click on the refresh button:
Click on the Databases tab and you’ll now see the DB12c Oracle home is now present in the list:
Prep VDBs for switch to new home
Copy your environments profile from 11g.env to 12c.env. Update the Oracle home to point to the new 12c home and save the file.
Now I have three VDBs on this target:
[delphix@linuxtarget ~]$ ps -ef | grep pmon

delphix   7501     1  0 Jul12 ?        00:01:17 ora_pmon_devdb
delphix   8301     1  0 Jul06 ?        00:01:49 ora_pmon_VEmp6
delphix  16875     1  0 Jul05 ?        00:01:57 ora_pmon_qadb
Log into the Linux Target and from the command line, set the environment and log into each database via SQL Plus and shut it down.
. 11g.env
export ORACLE_SID=VEmp6f
sqlplus / as sysdba
shutdown immediate;
exit;
and so on and so forth…. 🙂
Copy all the init files from the 11g Oracle Home/dbs for the VDBs over to the 12c Oracle Home/dbs/.
And this is where it all went wrong for two of the VDBs…
Back on the Delphix Admin Console, click on Manage –> Datasets
Click on each of the VDBs involved. Click on Configuration –> Upgrade, (up arrow icon) and say yes to upgrading. Update the Oracle home from the 11g in the drop down to the new 12c Oracle home and click the gold check mark to confirm.
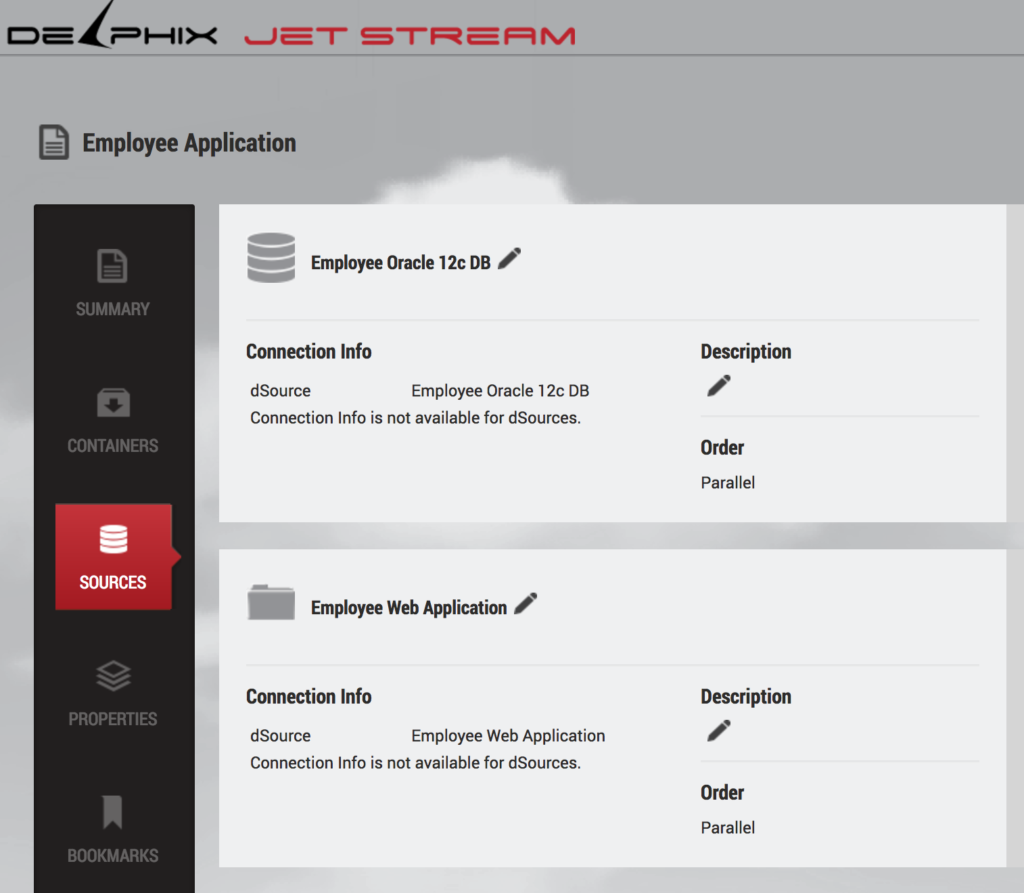
OK, so this is what I WOULD have done for all three VDBs if I’d been working with JUST VDBs, but this is where it gets a bit interesting and I had to go off the beaten path for a solution. I’m unsure if this is documented anywhere inside Delphix, (Delphix Support is awesome, so I’m sure they already know this, but for my own sanity) here’s the situation and the answer. The environment I am working on is built off of AWS AMIs that consist of Delphix containers. Containers are very powerful, allowing you to “package” up a database, application and other tiers of virtualized environments, offering the ability to manage it all as one piece. This was the situation for the qadb and the devdb instances.
Due to this, I couldn’t run the upgrade inside the Delphix Admin console since these two VDBs were part of Delphix “data pods.” The following are the steps to then address this change.
Remove the Containers, (Subsequently the VDBs as Well!)
- Log into the Delphix’s Jet Stream.
- Upper right hand corner, click on Usage Overview
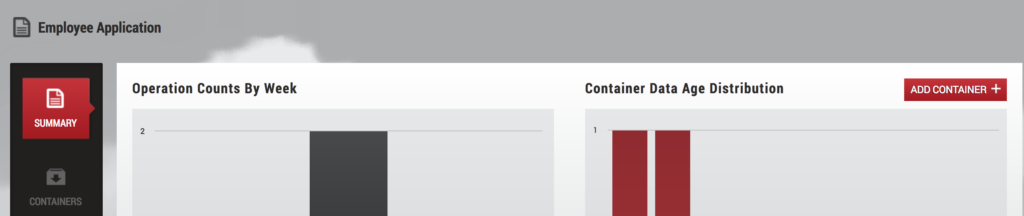
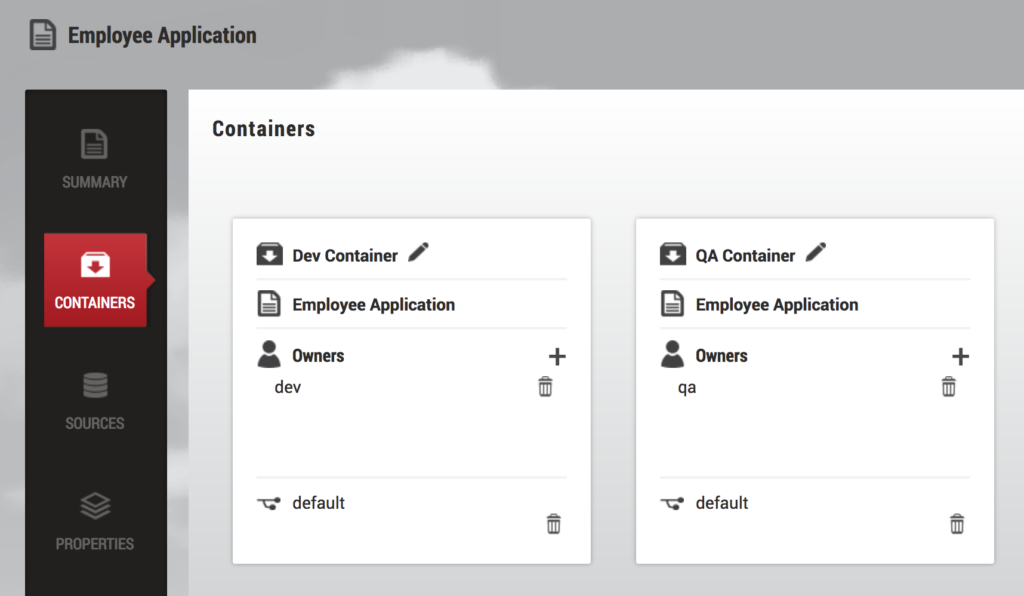
- Scroll down and click on Employee Application, (its the template for the VDBs in question..)
- At the bottom of this page, you’ll see the two containers that possess the VDBs as part of them. To the right, there is a trash can icon for delete. (The reason this is an option is that I have a template built for this container and it will be very simple to recreate a VDB and vfile to repopulate this container, (matter of minutes, max.)
 5. Delete the two containers that are controlling the administration of these two VDBs still pointing to the 11g home.
Create the New VDBs and Virtualized Application, (Vfiles)
Now, log into the Delphix Admin console.
- Provision two VDBs from the orcl source db, one as devdb and another as qadb, just as it was before, both on the Linux target.
- Provision two vfiles of the Web Application, one as QA_Web and the other as DEV_Web, port numbers 1080 and 2080, keeping all other defaults.
- Once completed, (couple minutes, max) then lets return to Jet Stream and create the containers that will house the system.
Create the New Containers From the Template
In Jet Stream
- Click on Data Management in the upper right hand corner
- You will be brought to the Templates tab, click on the Employee Application template
- Click on Add Container
- Name: “Dev 12c Container”, Owner: Dev and choose the devdb and the DEV_Web for the sources, then complete the container creation.
- Click again on Add Container
- Name: “QA 12c Container”, Owner: QA and choose the qadb and the QA_Web for the sources, then complete the container creation.
This will take just a moment to finish creating and that’s all there is to it. You now have two DB12c environments that are completely containerized and upgraded from their previous 11g state.
Our source shows we’re using our DB12c upgraded database:
And we can also see everything is upgraded and happy in our Delphix Administration Console. 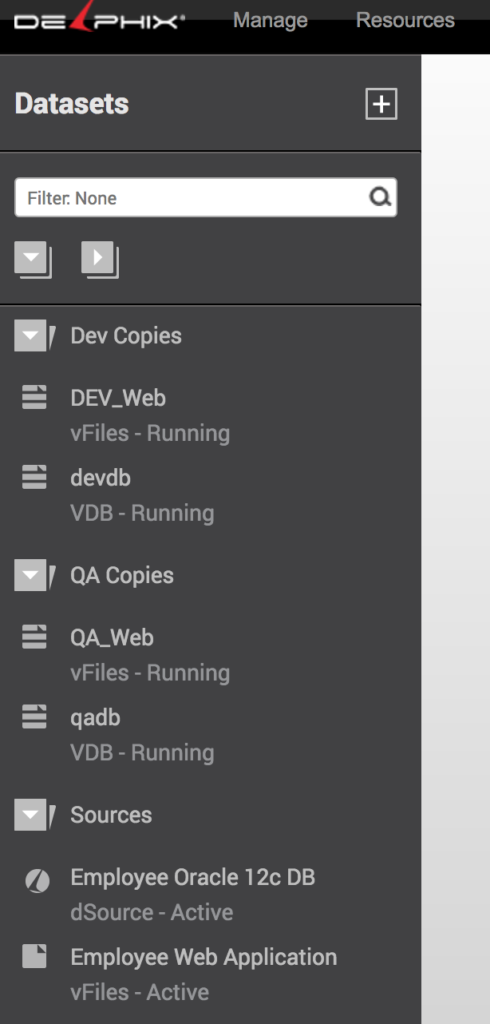
It may have taken a little longer for me to upgrade with the complexity of the containers introduced, but the power of data pods is exceptional when we’re managing our data, the database and the application as one piece anyway. Shouldn’t we treat it as one?