
Every job comes with tasks that no one likes to perform and database administration is no exception. Patching is one of those necessary tasks that must be performed and when we are expected to do more with less everyday, the demands of patching another host, another agent, another application is often a task that no one looks forward to. It’s not that it goes wrong, but that it’s just tedious and many DBAs know there are a lot of other tasks that could be better use of their time. Patching is still an essential and important task that must be performed, we all know that. OPatch and other patching utilities from Oracle make patching easy, but it can still remove a lot of time from a resource’s day.
Enterprise Manager 12c’s automated patching and provisioning, using the Database Lifecycle Management Pack is gaining more appreciation from the IT community as it assists the DBA with features to search recommended patches, create patch plans, review for conflicts and allow sharing and re-use of patch plans.
Configuring a Database for Online or Offline Patching
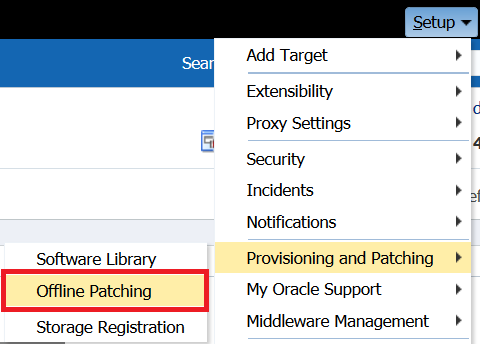
After logging into a target database, you can click on Setup and go to the Offline Patching setup:
You can then choose to use Online patching with MOS credentials:

or use Offline Credentials and configure the patching catalog and ensure you upload all the XML’s for the catalog, which will now be stored locally to a workstation. Once the upload is complete, run the Refresh From My Oracle Support job.
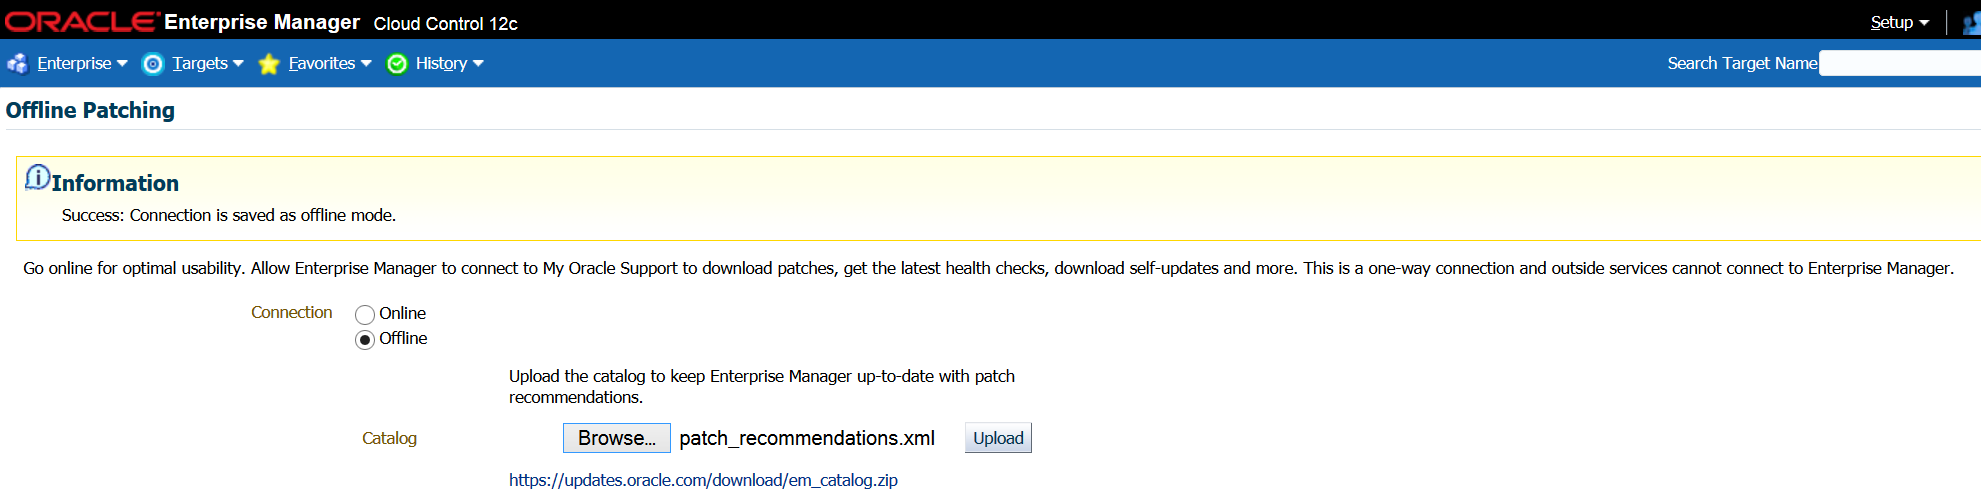
The Online configuration is recommended and works with the software library. It’s what we’ll be talking about today.
Also ensure that you’ve set up correct privileges to perform patching. Provisioning and patching require steps to be performed that will require privileges to run root scripts, so ensure that the credentials that are used for the patching allow to sudo to root or PBrun.
Database Patch Plans
To set up a patch plan for a database, there are a number of steps, but the patch plan wizard makes this very easy to do. For our example, we’ll choose to patch 11.2.0.4 databases to the latest recommended patches.
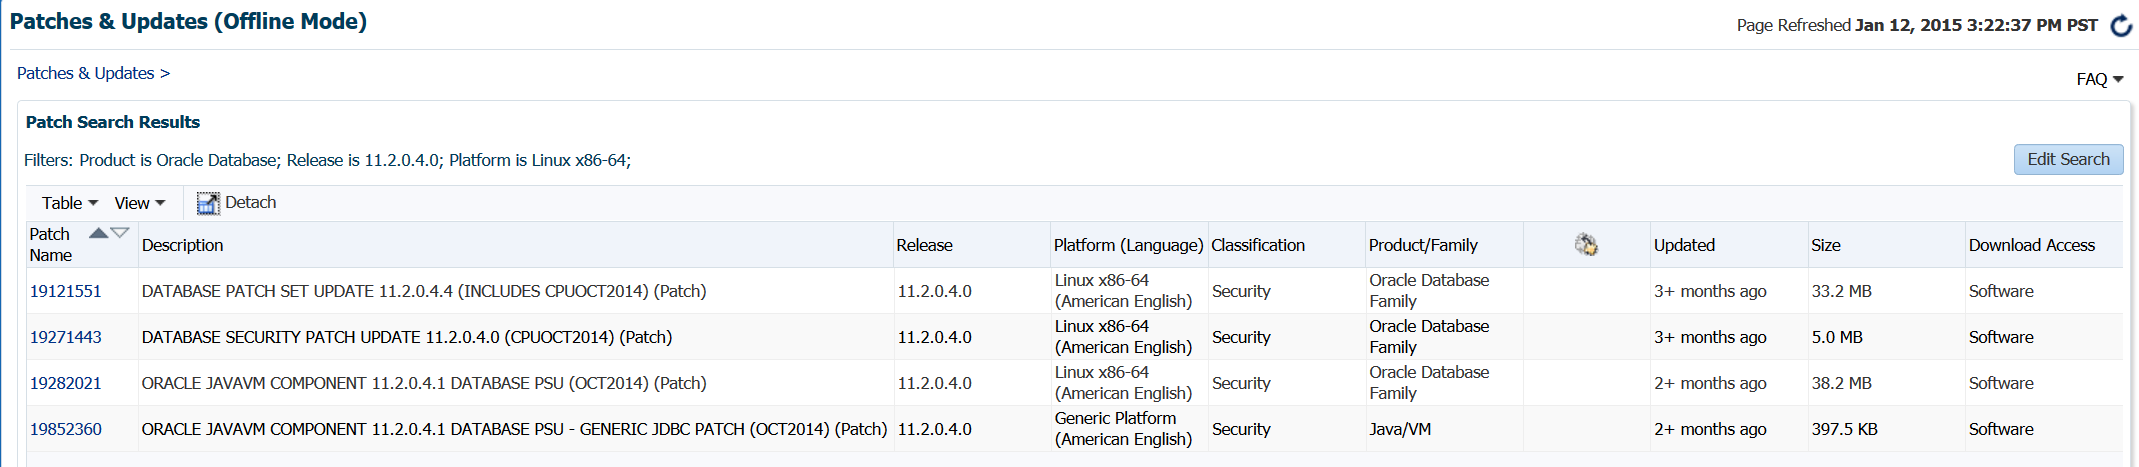
First, let’s do a search to find out what patches we’ll need to apply to our 11.2.0.4 databases in our EM environment.

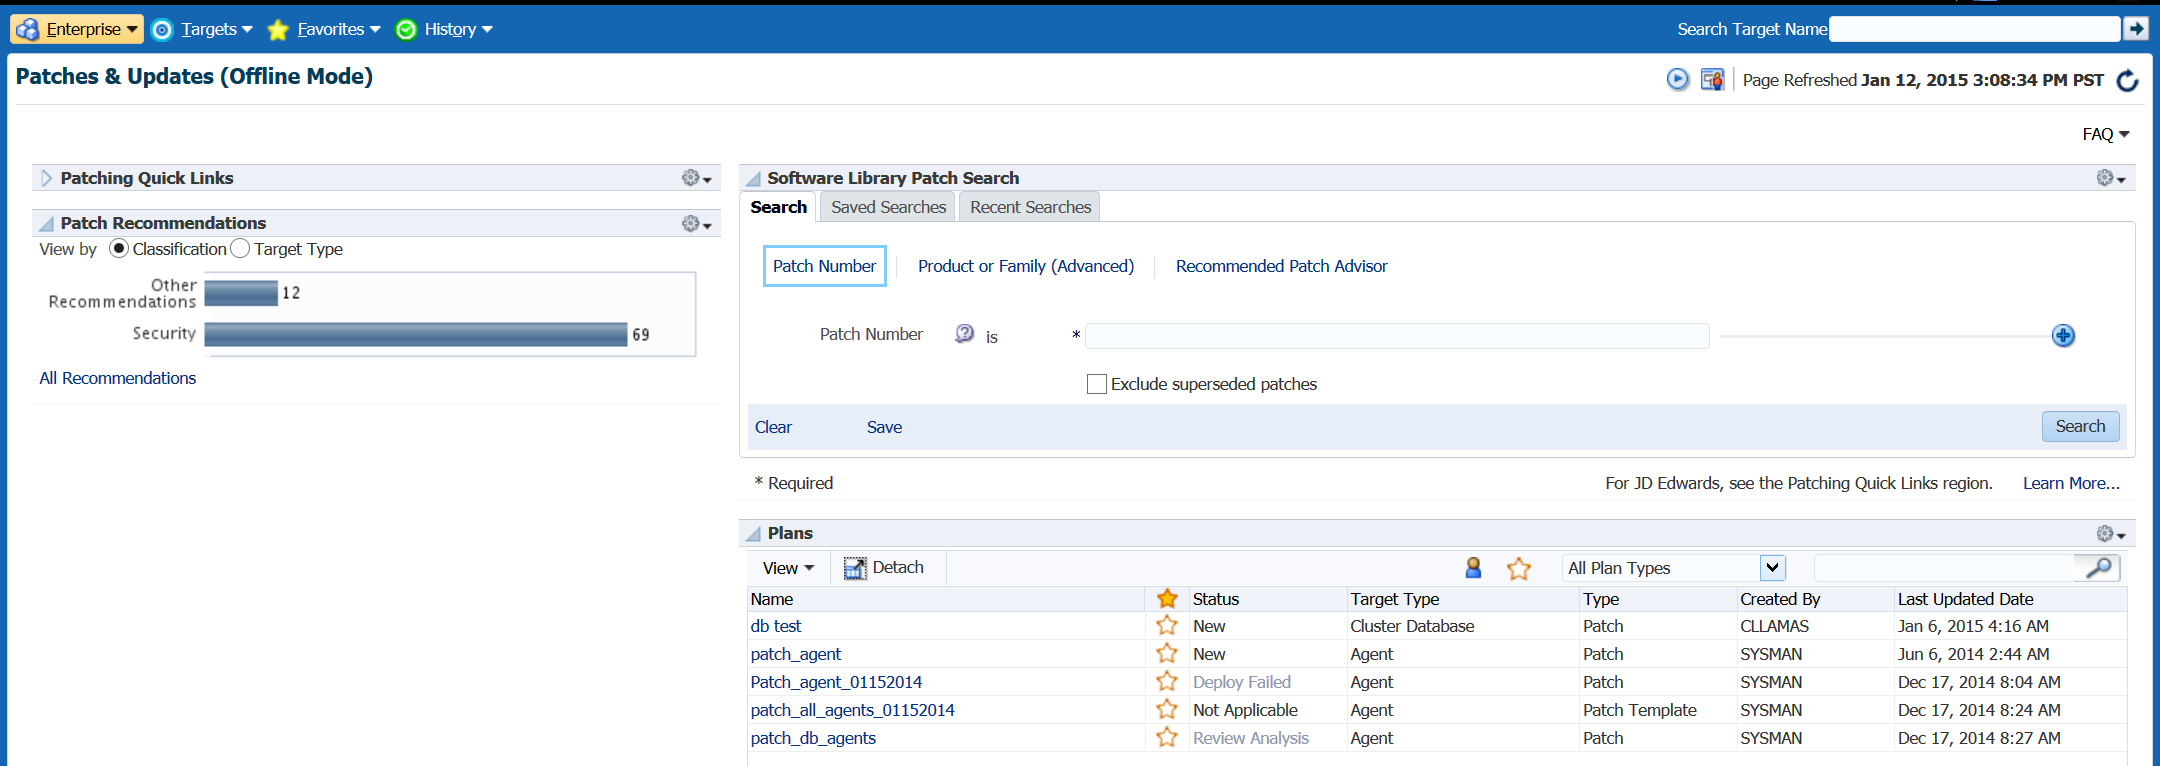
Our Enterprise menu takes us to the Provisioning and Patching, Patches and Updates.
From this console page, we can view what patch plans are already created in case we can reuse one:
As there isn’t an existing plan that fits what we need to do, we are going to first search for what patches are recommended with the Recommended Patch Advisor:
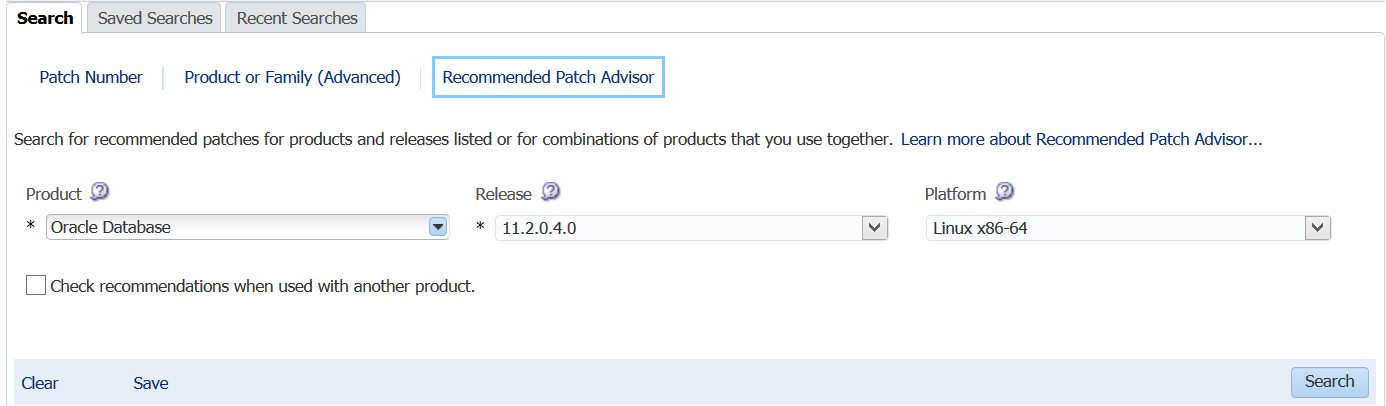
We’ve chosen to perform a search for recommended patches for 11.2.0.4.0 databases on Linux x86-64. This will return the following four patches:
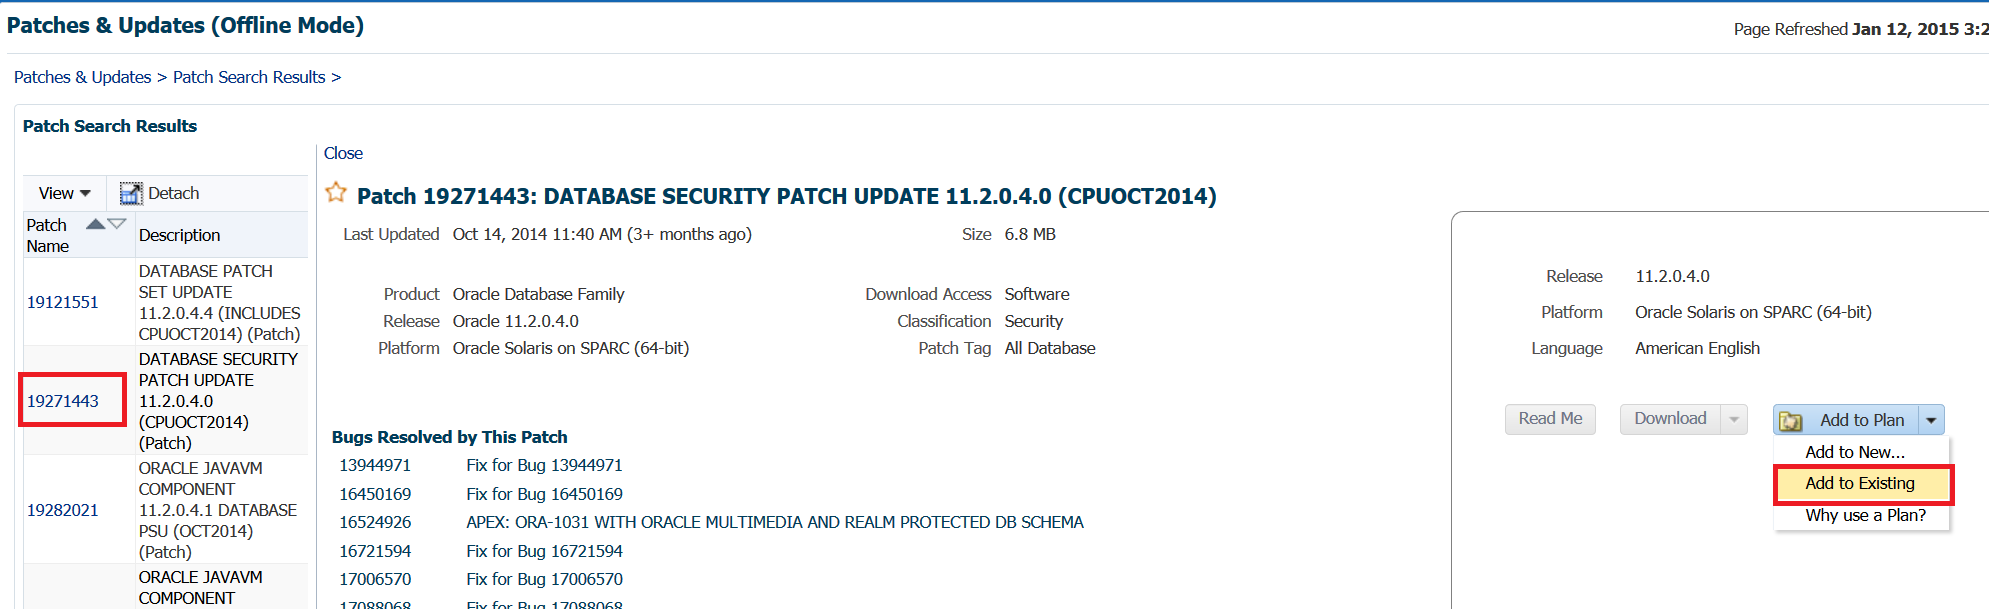
We can click on the first Patch Name, which will take us to the patch information, including what bugs are addressed in this patch, along with the option to download or create a patch plan. For the purpose of this post, we’ll choose to create a patch plan:
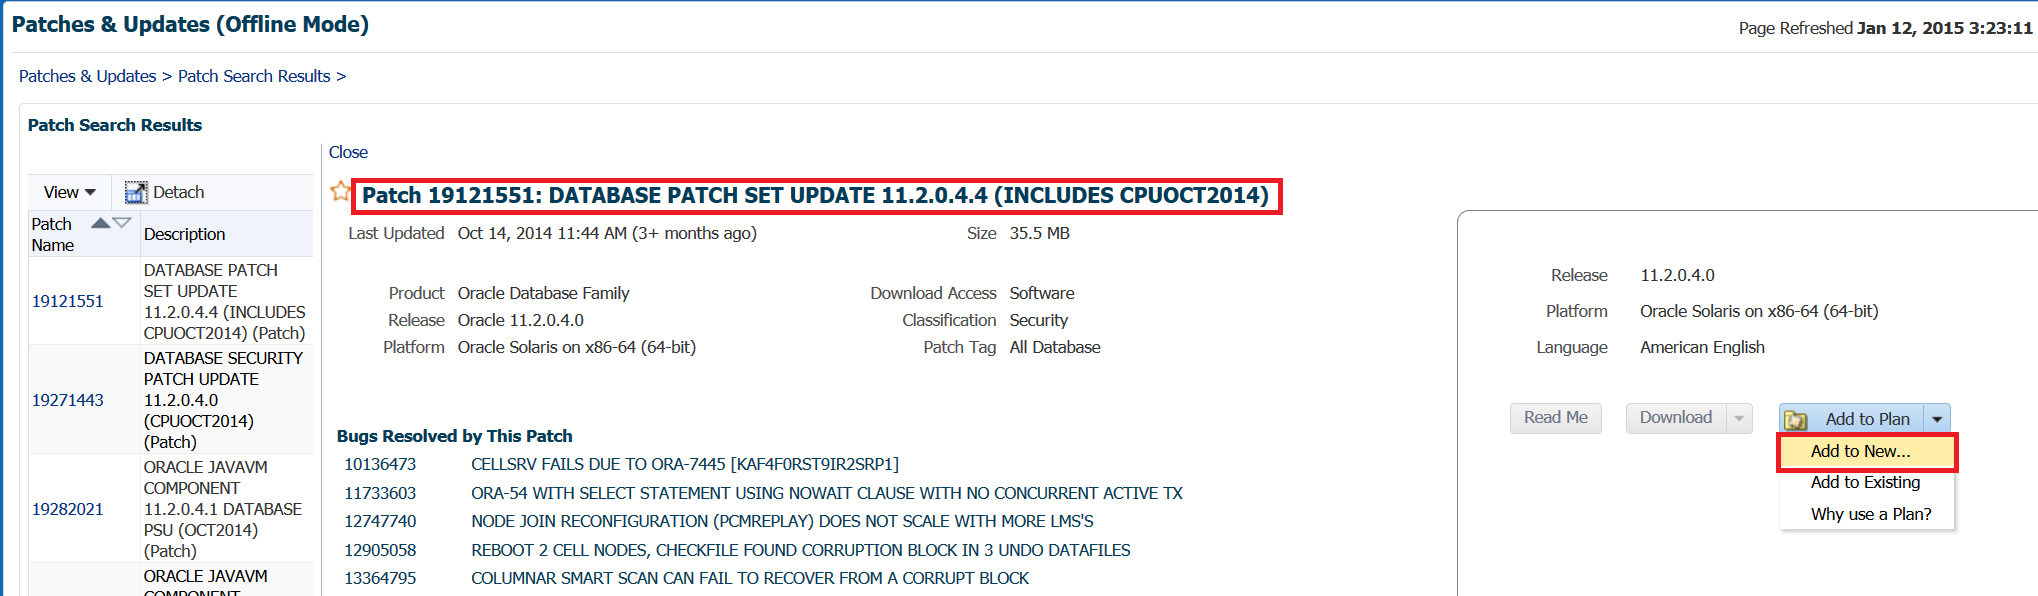
We’ll create a new patch plan for this, as our existing ones currently do not include an 11g database patch plan that would be feasible to add to. We can see our list of patches on the left, too, so this helps as we proceed to build onto our patch plans.
After clicking on the Add to New, we come to the following:
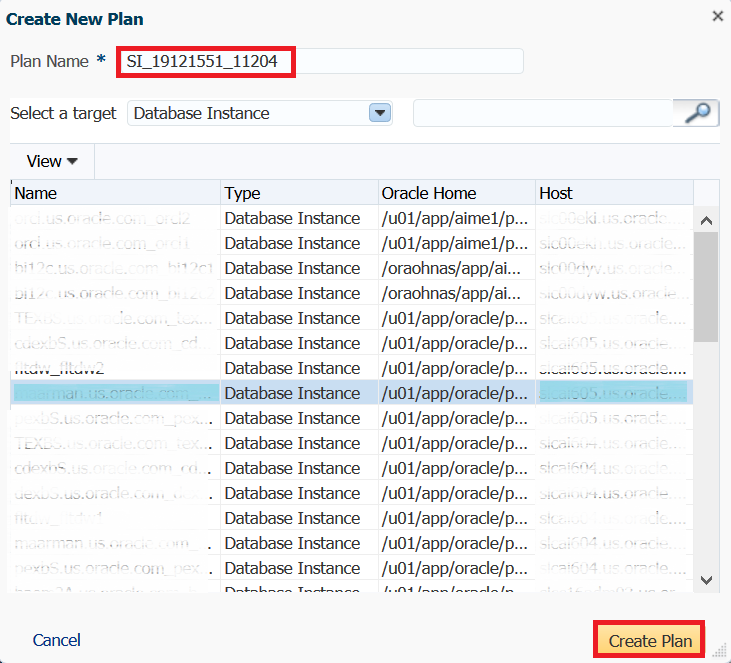
Name your patch plan something meaningful, (I choose to name the patch for a single instance, “SI”, the patch number and that it’s for 11.2.0.4) and then choose the database from the list you wish to apply the patch to. You can hold down the CTRL key and choose more than one database and when finished, click on Create Plan.
The patch plan wizard will then check to see if any other targets monitored by Cloud Control will be impacted and asks you to either add them to the patch plan or to cancel the patch plan for further investigation:
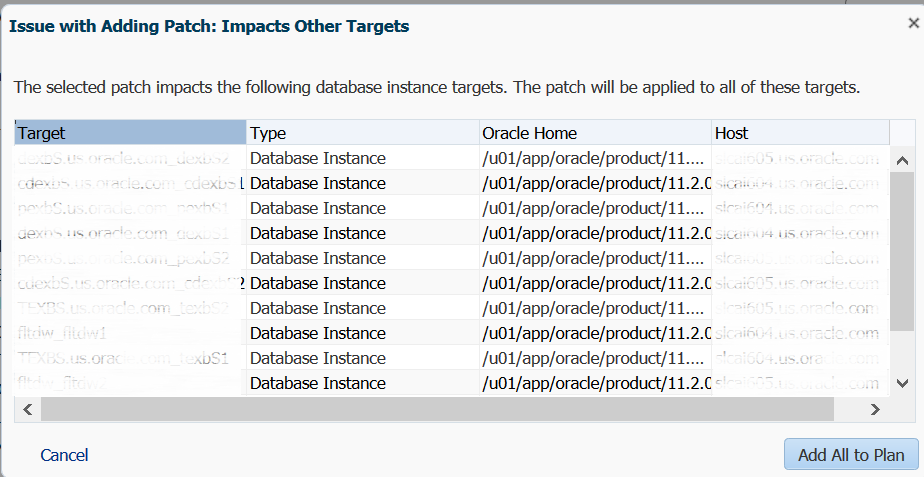
If you are satisfied to with the additions, you can click on Add All to Plan to proceed. The wizard then checks for any conflicts by the additions and will report them:
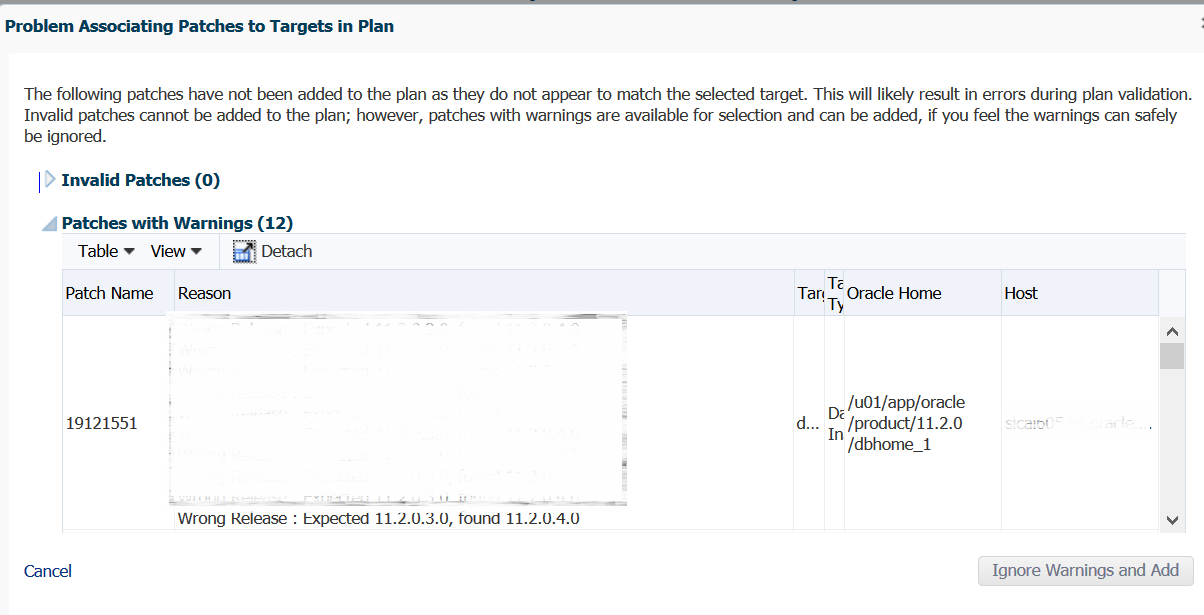
In our example above, I’ve added an 11.2.0.3 instance home to show that the wizard notes it and offers to either ignore the warnings and add it or (more appropriately) cancel the patch plan and correct the mistake.
Adding to Patch Plans
In our recommended patch list, we had four recommended patches. Once we’ve created our first patch plan, we can now choose to add to it with the subsequent patches from the list:
This allows us to create one patch plan for all four patches and EM will apply them in the proper order as part of the patch deployment process.
Patch Plan Review and Deploy
One a patch plan is created, the next step is to review and deploy it. Choose the patch plan from the list that we created earlier:

Double clicking on it will bring up the validation warning if any exist:

We can then analyze the validations required and correct any open issues as we review the patch plan and correct them before deploying:

We can see in the above checks, that we are missing credentials required for our patches to be successful. These can now be set by clicking to the right of the “Not Set” and proceed with the review of our patch plan.
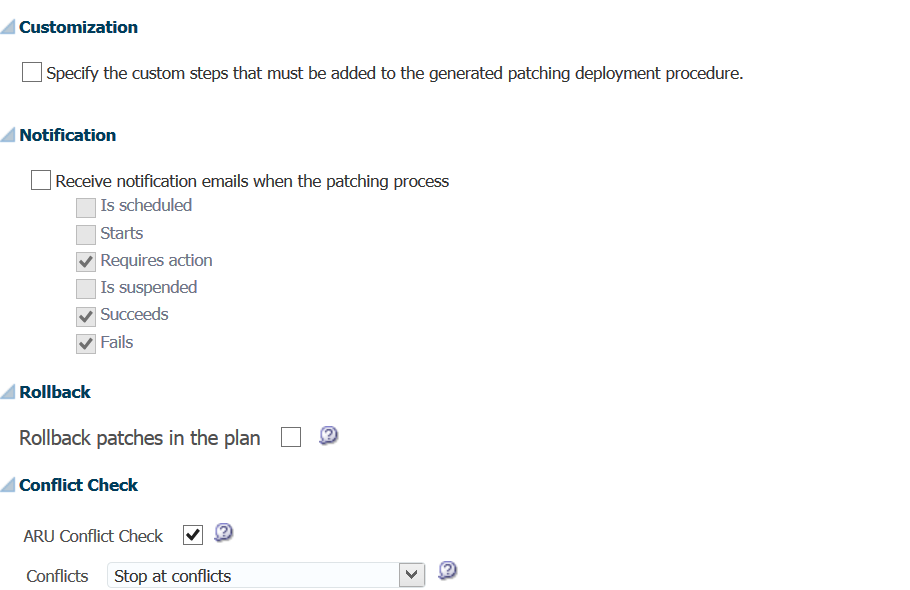
Next we add any special scripts that are required, (none here…) any notification on the patching process so we aren’t in the dark while the patch is being applied, rollback options and conflicts checks.
These steps give the database administrator a true sense of comfort that allows them to automate, yet have notifications and options that they would choose if they were running the patch interactively.
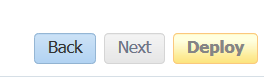
Once satisfied with the plan, choose the Deploy button and your patch is now ready to scheduled.
Once the patching job completes or if it experiences an issue and results in executing the logic placed in the above conflict/rollback steps, the DBA can view the output log to see what issues have occurred before correcting and rescheduling.
Output Log
Step is being run by operating system user : 'ptch_em_user'

Run privilege of the step is : Normal

This is Provisioning Executor Script
…
Directive Type is SUB_Perl
…
The output of the directive is:
…
Tue Jan 6 00:15:40 2015 - Found the metadata files; '19121551' is an patch
…
Tue Jan 6 00:15:40 2015 - OPatch from '/u01/app/oracle/product/11.2.0/dbhome_1/OPatch/opatch.pl'
  will be used to apply the Interim Patch.
…
Tue Jan 6 00:15:52 2015 - Invoking OPatch 11.2.0.4.7
…
Following patches will be rolled back from Oracle Home on application of the patches in the given list :
   4612895
…
Do you want to proceed? [y|n]
Y (auto-answered by -silent)
User Responded with: Y
OPatch continues with these patches:  6458921

Do you want to proceed? [y|n]
Y (auto-answered by -silent)
User Responded with: Y

Running prerequisite checks...
This is high level, but really, it’s quite easy and the more you automate provisioning and patching, the easier it’ll get and you’ll wonder why you waited so long!
Does automated patching include the Exadata Server? If not, will patching the database with EM12C automated patching conflict with Exadata?
Thanks!
Jason
YES, it includes Exadata. I kept my post to just databases this time, but it covers almost all areas of the database environment!