
With EM13c, DBaaS has never been easier. No matter if you’re solution is on-premise, hybrid, (on-premise to the cloud and back) or all cloud, you’ll find that the ability to take on DevOps challenges and ease the demands on you as the DBA is viewed as the source of much of the contention.

On-Premise Cloning
In EM13c, on- premise clones have been built in by default and easier to manage than they were before. The one pre-requisite I’ll ask of you is that you set up your database and host preferred credentials for the location you’ll be creating any databases to. After logging into our the EMCC and going to our Database Home Page, we can choose a database that we’d like to clone. There are a number of different kinds of clones-
- Full Clones from RMAN Backups, standby, etc.
- Thin Clones with or without a test master database
- CloneDB for DB12c
For this example, we’ll take advantage of a thin clone, so a little setup will be in order, but as you’ll see, it’s so easy, that it’s just crazy not to take advantage of the space savings that can be offered with a thin clone.
What is a Thin Clone?
A thin clone is a virtual copy of a database that in DevOps terms, uses a test master database, a full copy of the source database, as a “conduit” to then create unlimited number of thin clone databases that save up to 90% on storage requirements separate full clone for each would need.
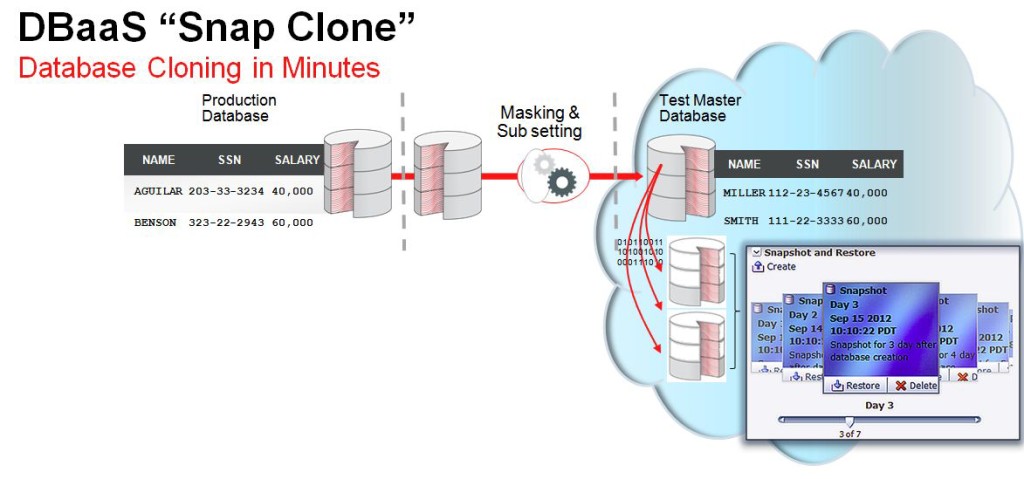
One of the cool features of a test master is that you can perform data masking on the test master so that there is no release of sensitive production data to the clones. You also have the ability to rewind or in other words, let’s say, a tester is doing some high risk testing on an thin clone and gets to a point of no return. Instead of asking for a new clone, they can simply rewind to a snapshot in time before the issue that caused the problem occurred. Very cool stuff…. 🙂
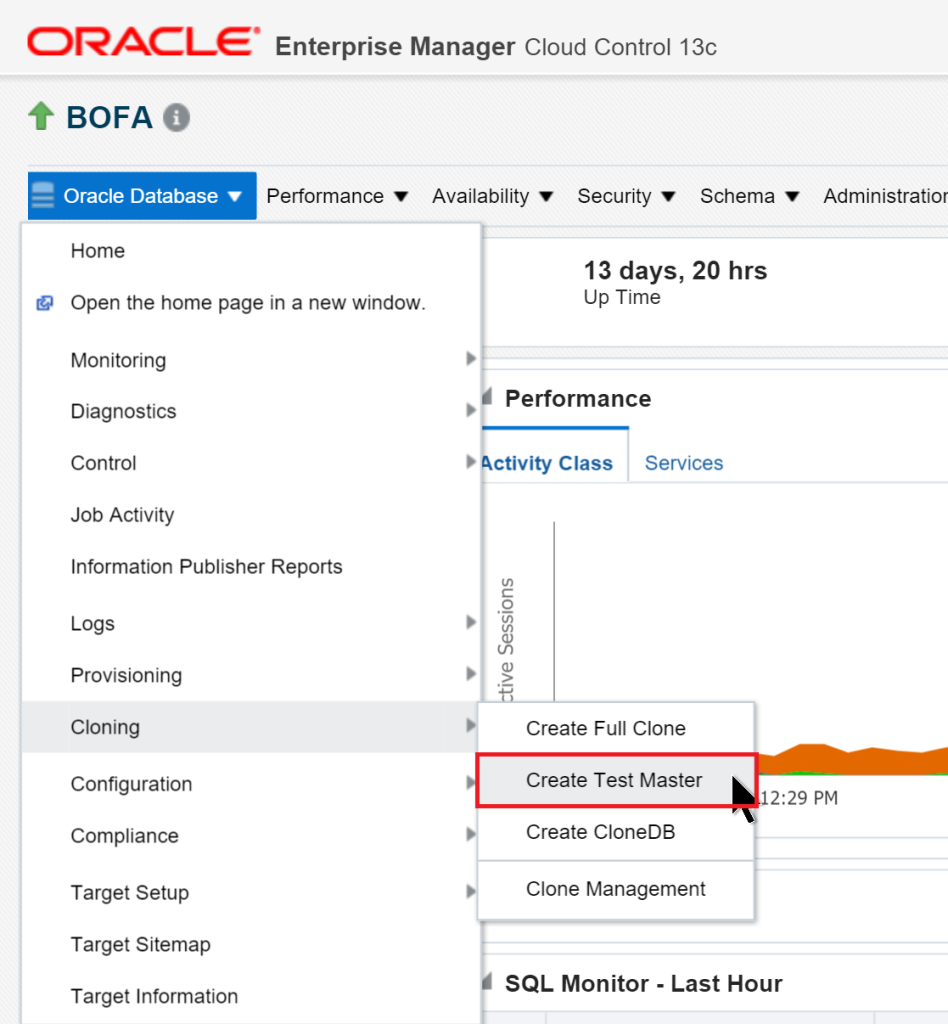
Creating a Test Master Database
From our list of databases in cloud control, we can right click on the database that we want to clone and proceed to create a test master database for it:
The wizard will take us through the proper steps to perform to create the test master properly. This test master will reside on an on-premise host, so no need for a cloud resource pool.
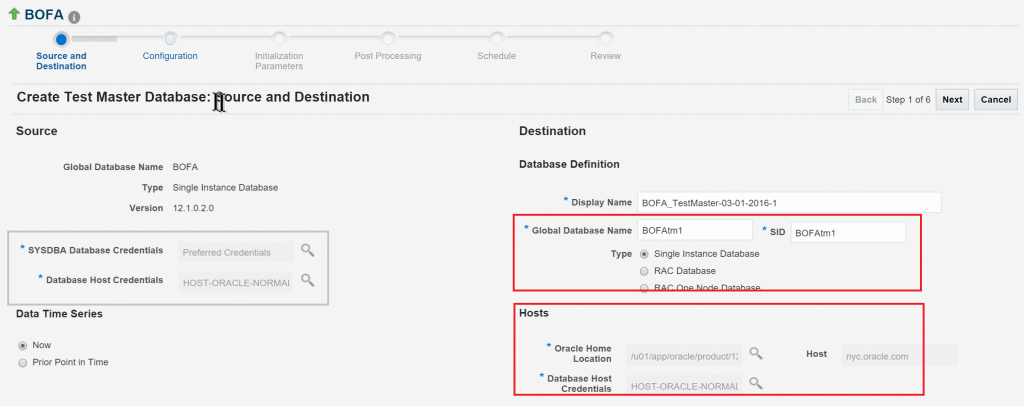
As stated earlier, it will pay off if you have your logins set up as preferred credentials. The wizard will allow you to set those up as “New” credentials, but if there is a failure and they aren’t tested and true, it’s nice to know you already have this out of the way.
Below the Credentials section, you can decide at what point you want to recover from. It can be at the time the job is deployed or from a point in time.
You have the choice to name your database anything. I left the default, using the naming convention based off the source, with the addition of tm, for Test Master and the number 1. If this was a standard database, you might want to make it a RAC or RAC one node.
Then comes the storage. As this is an on-premise, I chose the same Oracle Home that I’m using for another database on the nyc host and used the same preferred credentials for normal database operations. You would want to place your test master database on a storage location that would be separate from your production database so as not to create a performance impact.
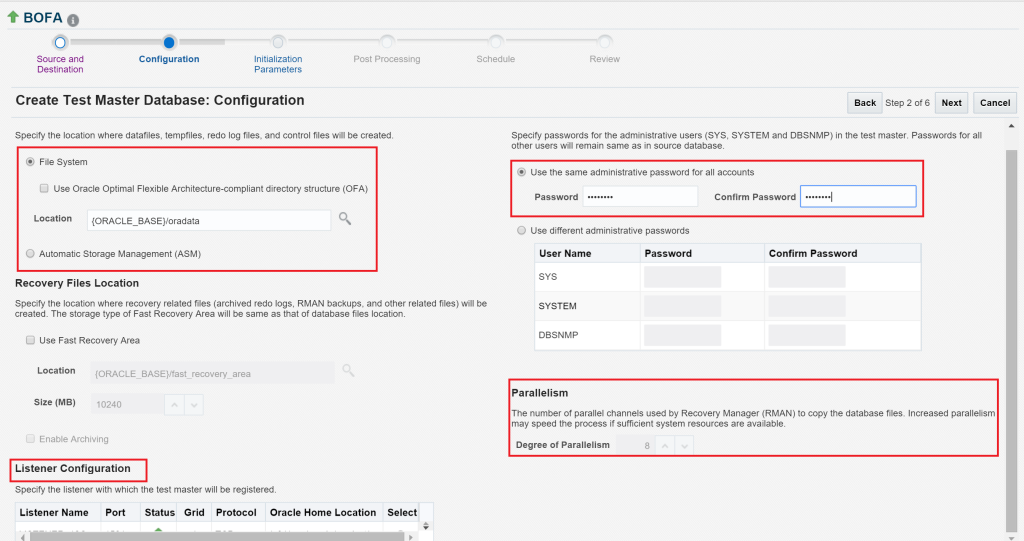
The default location for storage of datafiles is offered, but I do have the opportunity to use OFA or ASM for my options. I can set up Flashback, too. Whatever listeners are discovered for the host will be offered up and then I can decided on a security model. Set up the password model that best suits your policies and if you have a larger database to clone, then you may want to up the parallel threads that will be used to create the test master database. I always caution those that would attempt to max the number out, thinking more means better. Parallel can be throttled by a number of factors and those should be taken into consideration. You will find with practice that you find a “sweet spot” for this setting. In your environment, 8 may be the magic number due to network bandwidth or IO resource limitations. You may find it can be as high as 32, but do take some time to test out and know your environment.
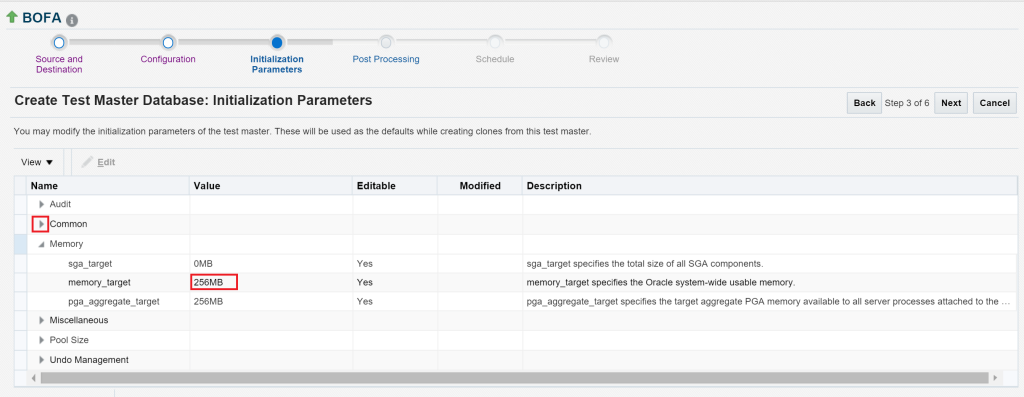
Now comes the spfile settings. You control this and although the defaults spfile for a test master is used here, for a standard clone, you may want to update the settings for a clone to limit the resources allocated for a test or development clone.
Now if you have special scripts that need to be run as part of your old manual process of cloning, you can still add that here. That includes BEFORE and AFTER the clone. For the SQL scripts, you need to specify a database user to run the script as, too.
If you started a standard clone and meant to create a test master database, no fear! You still have the opportunity to change this into a Test Master at this step and you can create a profile to add to your catalog options if you realize that this would be a nice clone process to make repeatable.
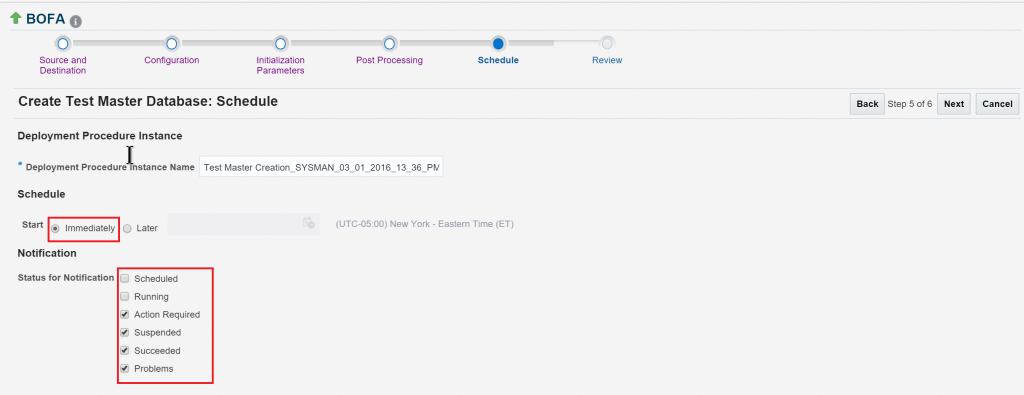
The EM Job that will create the clone is the next step. You can choose to run it immediately and decide on what kind of notifications you’d like to receive via your EM profile, (remember, the user logged into the EMCC creating this clone is the credentials that will be used for notification….) You can also choose to perform the clone later.
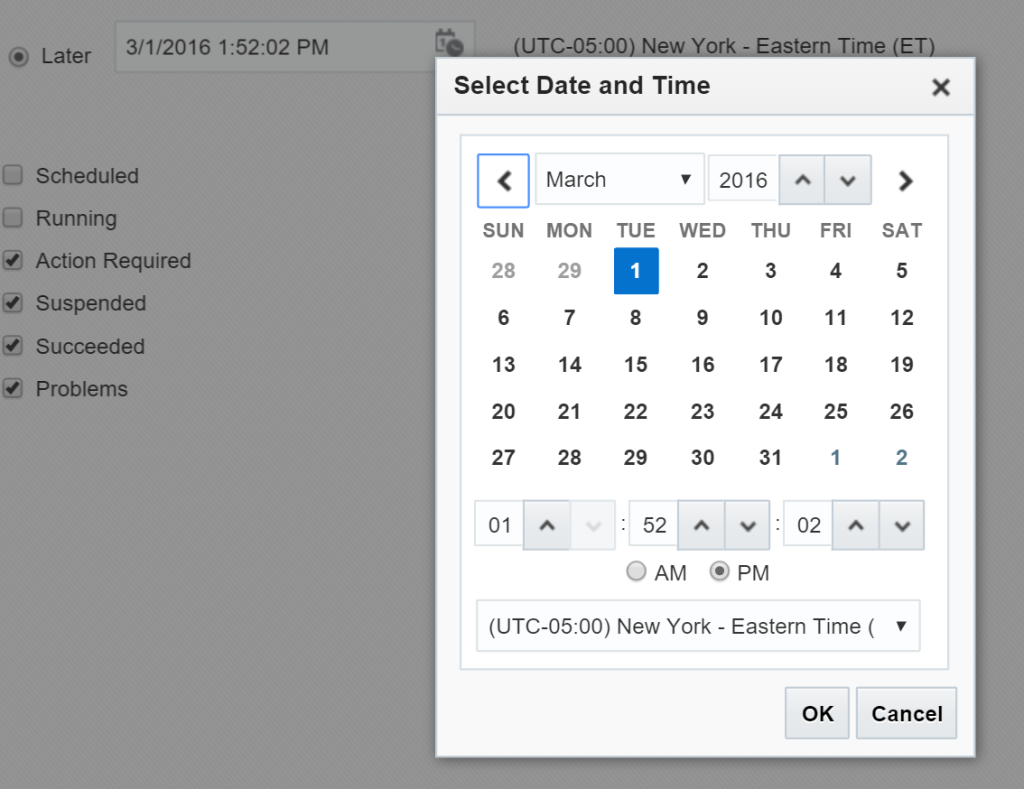
The scheduling feature is simple to use, allowing you to choose a date and time that makes the clone job schedule as efficient as possible.
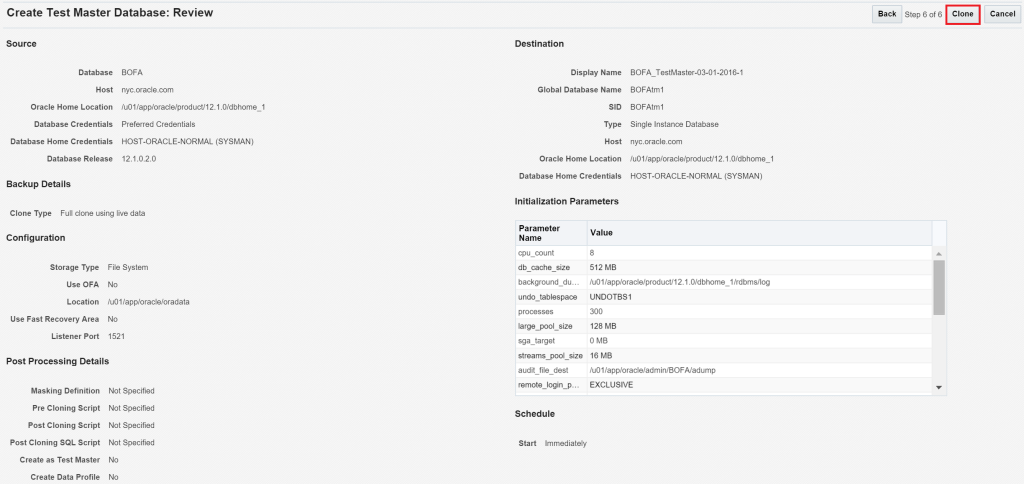
Next, review the options you’ve chosen and if satisfied, click on Clone. If not, click on Back and change any options that didn’t meet your expectations.
If you chose to run the job immediately, the progress dashboard will be brought up after clicking Clone.
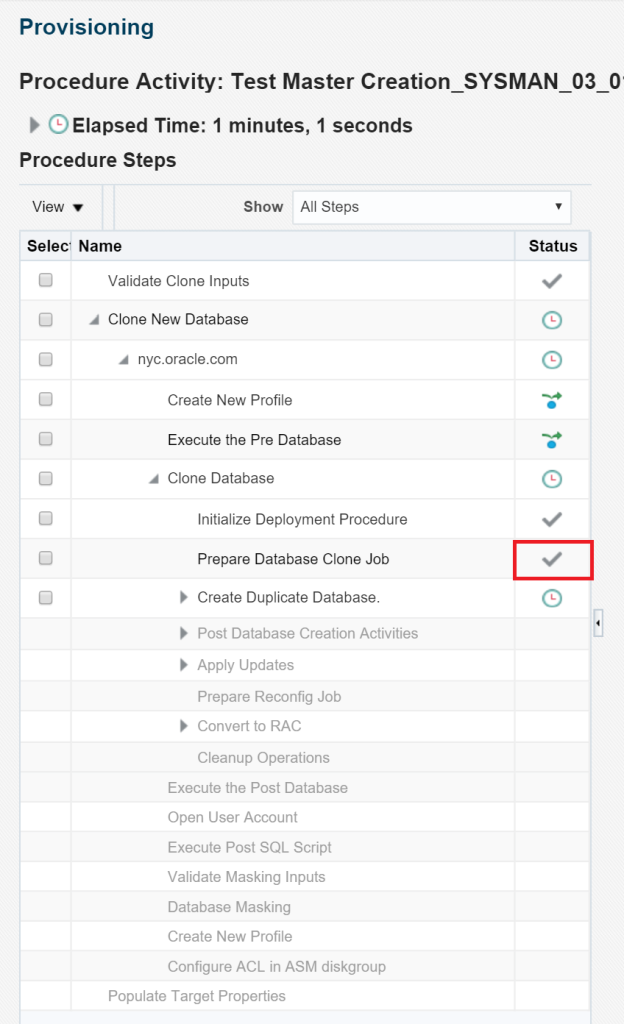
Procedure Activity is just another term for an EM Job and you’ll find this job listed in Job Activity. It’s easier to watch the progress from here and as checkmarks show in the right hand column, the step is completed successfully for your test master or clone.
Once the clone is complete, remember that this new database is not automatically monitored by EM13c unless you’ve set up Automatic Discovery and Automatic Promotion. If not, you’ll need to manually discover it. You can do that following this blog post. Also keep in mind, you need to wait till the clone is finished, so you can set the DBSNMP user status to unlocked/open and ensure the password is secure.
Now that we’ve created our test master database, in the next post, we’ll create a thin clone.