I fell in love with the first Raspberry Pi that was brought on the market and since joining Redgate, have a tendency to visit the Raspberry Pi store in Cambridge each visit to HQ. I just bought the RPI 5 with a new setup and hope to revisit this favorite hobby and STEM education tool soon!
My history with RPI goes back to a Raspberry Pi meetup that helped support my addiction to this fun little computer, but with all the other volunteer and demands on my life, I don’t have as much time for it as I used to. I’ve done a lot with it around tech education, including ODTUG and their 2nd Geekathon that allowed me the opportunity to use a RPI III and zero with some Python and other code, along with the GPS locator from our 2017 event badges to create a project that can be found here.
Raspberry Pi, the Facts
Raspberry Pi’s are like Lay’s potato chips, you may find out that you can’t have just one. I currently have quite a number of them. An original “A”, three “B+”, a couple Pi Zeros and four Raspberry Pi 3. They are great units for small projects and I have multiple sets of Micro SD Cards with adapters, different OS versions and even use something called Berry Boot so that I can have multiple OS boot options on a single 16G Micro SD Card.
I do work with Adruino, small maker projects and other maker compute boards, single board computers and kits that offer opportunities to work on creative, tech education, so if you have a question about any of the technology, I’m a good one to ask!
If you’re new to Raspberry Pi and want to learn a bit about it, I found this video to be very informational and recommend it highly.
Shopping List for Your Raspberry Pi
I created a post on what you should get to ensure you have the most complete and mobile Raspberry Pi set up. I need to update this and should have a slide deck, “Raspberry Pi, Why and What to Buy” out soon. It will cover the differences in cost and ownership of the popular B+ version vs. the Pi Zero, along with my favorite accessories, add-ons and projects, but know that the Raspberry Pi 3 is now out. I am recommending the Raspberry Pi 3 in the canakit. These kits, especially if you’re new to RPIs, is a great way to start and you’ll know that you have everything you need out of the box to start working with the Raspberry Pi.
Now the main difference with the Raspberry Pi 3 is that you have the WiFi built into the unit. This will save you some challenges with the dongle, (I have a blog post about forcing the Wifi to be stable, an issue I haven’t seen with the built in Version 3) and the power is upped on CPU and memory.
The other reason for this kit is that it comes with the 32G Micro SD Card. The Jessie version of the OS, additions that you may add are taking up more room. Where a 4G card was sufficient for the A+ and the B+ worked fine with an 8G card, it’s time to move on and not worry about having to resize a partition or backup and build out your OS on a new card every few months.
If you would like to know more about what to buy, see my slide deck on “The What to Buy and Why of Raspberry Pi” here!
To this setup, I’d definitely add the following:
A small touchscreen monitor. Some recent offers have made this an easier financial purchase, (the RPI is so inexpensive, that a monitor can often be the most expensive investment…) There are two that are my favorite and the one I have is direct from Raspberry Pi and I get compliments on it all the time. The added bonus of the RPI mounting to the back of the screen, if you add the frame, (an extra $10) just makes it all the more appealing. The second best one comes from AdaFruit and it’s a bit more expensive and the frame doesn’t seem as nice, (although it does have metal feet.)
The Pibrella card, which is one of my favorite editions for GPIO coding projects, making them exceptionally easy to wire to your Raspberry Pi. There’s a great Pibrella Commands PDF to use when working with the board!
A camera board is another excellent addition that allows you to do numerous projects, including turning your Raspberry Pi into a GoPro camera! 🙂
The third item is an adapter board to use Adruino projects with your Raspberry Pi so you can have the best of the both worlds. I prefer the Raspberry Pi, but why limit one self on project opportunities?
What You Won’t Need, (at least at first…)
Sensors, wires, breadboard, jumper wires, etc. You’ll find that it’s best to get used to your RPI first, then find simple projects to work with and start purchasing what you need for that project. As each project may have very unique add-ons, you may find yourself obsessed with motors and yet owner of a ton of accessories that just sit and collect dust for a long time.
A case- Now this sounds odd, but most cases are not constructive to working with RPI projects. The base will keep micro USB, USB or other odd shaped connectors from connecting completely and the top half of the cases commonly end up blocking access to the GPIO. Many of them are made of hard, brittle plastics that crack or break closing mechanisms on when attempting to open and close them repeatedly to get access to the RPI.
What’s my recommendation to protect that Raspberry Pi? Well, first off, if you invest in one of the 7 inch monitors, then your RPI will be mounted to the back and will be pretty safely surrounded by a larger frame monitor and stand.
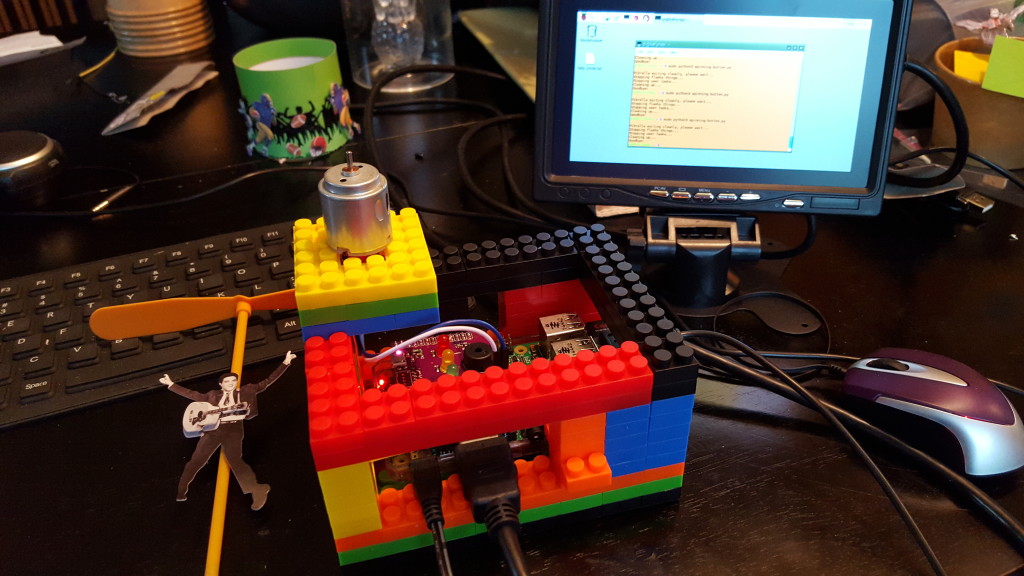
What’s the next best option if you do want a case? Build one from Lego. There are kits you can buy, but it’s really easy to build a robust and easily re configurable case from Lego blocks that will protect your case and support your projects, (which you can see in my pictures on this page!)
Projects
These are my projects, which will start to grow as we do more and more with the Raspberry Pi SIG, (Special Interest Group) and I’ll post project links here as I do my own that may not be applicable to the SIG, too.
Creating a spin controlled art or spinner project with the Raspberry Pi and the Pibrella Card.
Red Light, Green Light with the Raspberry Pi and Pibrella Card
Enhancing a Moving Art/Flyer Project to Beginning Robotics with Raspberry Pi
Raspberry Pi Paper Airplane Launcher
Adding Music to your Raspberry Pi Project
Want to have a Virtualbox Image on your PC setup to do the projects? Check it out!
Denver’s Makers Faire, November 2015
Raspberry Pi 2 Wifi Inconsistency
Adding GPIO Pins to the Raspberry Pi Zero
Adding a Database to the Raspberry Pi Zero
Programming Simple Games with the Raspberry Pi
Raspberry Pi Project Idea Printouts
Valuable Links for projects and Info
Using Jump Drives with Your Raspberry Pi
